Tutorial:How to play
| This article is outdated. You can help Satisfactory Wiki by updating it. |
This page serves as a how to play guide / walkthrough for Satisfactory.
Overview
Satisfactory is a factory-building game, centered around expansion, exploration, and automation. Build a factory to automate the production of various resources required to progress through Milestones, culminating in a fully-upgraded Space Elevator for Project Assembly. As each Milestone tier is completed, more game content is unlocked. The requirements for the next tier become increasingly complex and time-consuming to fulfill, so it is advised to expand the factory to produce the required parts automatically and efficiently.
The player-controlled game character, the pioneer, lands on an alien planet named MASSAGE-2(A-B)b with only basic tools to build The HUB. The game narrator, ADA, provides guidance throughout Tier 0 while Tier 1 to Tier 7 are left for the player to explore. Game content is mostly unlocked via Milestones and Research. Higher tiers of Milestones, in turn, are unlocked at the Space Elevator. Additional content is unlocked at the AWESOME Shop.
There are collectibles scattered around the World which can be used to increase factory efficiency. These items include Power Slugs and Hard Drives. There are hostile creatures guarding these resources. Combat and exploration are also part of the gameplay. There is no peaceful mode in the vanilla game.
Guide
Satisfactory is an open-ended game. As there is no actual 'Win' condition, players are not required to strictly follow this guide.
Spoiler warning: If you wish to explore the game mechanics by yourself, stop reading now.
Disclaimer: This guide is written by community members and does not represent the 'Official Guide' in any way.
Game start
- At the main menu, review the controls, video, and audio settings. Adjust where necessary.
- Recommendations:
- Tick 'Enable Directional Subtitles', which allows easier detection of hostile creatures.
- For continuous running without holding down ⇧ Shift, un-tick 'Hold to sprint'.
- Recommendations:
- Start a New Game.
- Pick one of the four starting areas. They are all connected in the same world.
- For this guide, select the 2nd - Rocky Desert.
- Other than the visual differences between the biomes, all of the starting areas have about the same gameplay difficulty. There is enough foliage even in the Dune Desert to last until sustainable power becomes available.
- Enter the session name. Tick 'Friends Only' for hosting a multiplayer session or leave it as 'Private' for a single player.
- You are advised not to tick 'Skip Intro' at the bottom right.
- Tick only when you are already familiar with the early game. Skipping the intro can save about 30 mins ~ one hour of gameplay time.
- An intro movie will play. Wait for it to end.
- It can be skipped by pressing Esc and clicking 'SKIP INTRO'.
Before moving
- In the cutscene, the pioneer (the game character) picks up the Build Gun and walks out of the drop-pod.
- At first, most of the control keys are locked. As we progress, these functions will be unlocked progressively.
- The game narrator, ADA, will advise you about each objective. Pressing ↵ Enter will skip her narrations.
- Avoid skipping ADA's narrations during your first playthrough.
- Look at the game's Head-Up Display:
- At the bottom right are the shortcut keys; they are updated according to the current keybindings.
- In this guide, the default keybindings will be referenced.
- At the lower left is the pioneer's health bar. You have 100 HP, divided into 10 segments.
- We will soon encounter our first combat so keep an eye on it.
- At the top left is the current game version.
- For a multiplayer session, all clients must be running the same game version as the host to be able to join the game.
- At the middle left is the current objective recommended by ADA.
- At the top is the compass.
- A Map is not currently available but will be unlocked at a much later game stage. Progress through the Quartz Research tree to unlock it.
- Look around with the mouse. The direction of the drop-pod is indicated on the compass.
- At the bottom right are the shortcut keys; they are updated according to the current keybindings.
- Press F to enter dismantle mode:
- Aim at the drop-pod until it is highlighted in orange. This means it is targeted to be dismantled.
- At the center of the screen you will see the resources that will be returned to you when you dismantle the target. Usually, this will be equal to the building cost.
- All buildings are 100% refundable.
- Below the center of the screen is a list of additional control keys.
- While dismantle mode is active, the edge of the screen blinks red.
- After the drop-pod is dismantled, the HUB Parts item is added to the pioneer's inventory.
- ADA will advise you to open the Codex, the in-game encyclopedia.
- ADA will advise you to equip the Xeno-Zapper.
- Open the inventory Tab ↹ and observe:
- There are two items in your inventory slots: the HUB Parts, and the Xeno-Zapper, the starter melee weapon.
- 16 inventory slots are available at the beginning. Additional slots can be unlocked later.
- At the bottom left is the sort button.
- At the bottom middle is the trash slot. Dragging items into it will delete the item permanently. Do not use it now.
- At the right is the character equipment slot.
- one body slot and one hand slot are available at the start.
- Additional hand slots can be unlocked later. The body slot, however, is limited to one only.
- ⇧ Shift+
 the Xeno-Zapper to equip it. Alternatively, you can double-click it or drag it to the hand slot.
- There are two items in your inventory slots: the HUB Parts, and the Xeno-Zapper, the starter melee weapon.
- Click and drag the HUB Parts to the outside the inventory window to drop it onto the ground.
- Dropped items will never de-spawn. This is useful when running out of inventory space or when transferring items in multiplayer.
- Close the inventory window Esc or click at the 'X' at the top right.
- Pick up the HUB Parts by looking at it and interacting E.
- It displays '+1 HUB Parts (1)'. The +1 represents the quantity of this item obtained in the recent past.
- The number in the parentheses () indicates the quantity of this item in the inventory.
Loot for thought
- This section is only for more experienced players. If this is your first time playing Satisfactory, skip this section to avoid getting yourself injured.
- Remember high risk, high rewards.
- Pick up plenty of
 Beryl Nuts for healing.
 - For biomass, prioritize picking up Wood over Leaves since it can be converted into more Biomass.
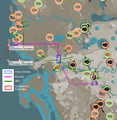
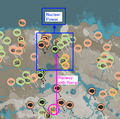
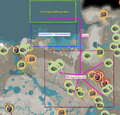
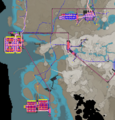
- Instead of going for Iron Ore, visit the marked Crash Sites in the image below and pick up E their loot.
- You won't have the in-game Map unlocked at the current moment. Use only the compass and terrain features to orientate yourself.
- The Lizard Doggo cave east of Oil Islands has plenty of loot-able items on the cave floor.
- Visiting other Crash Sites is not advised as they are guarded by Alpha creatures which can be difficult to kill with only the Xeno-Zapper, but not impossible if you can manage to stay under their hitboxes.
- Unlock one of the Crash Sites with nine Modular Frames and keep the Hard Drive for researching Alternate Recipes later. Prioritize Casted Screw, then save the rest for after you unlock Tier 5 - Alternative Fluid Transport.
- At the end of the trip, you should have:
 Wire: 552
 Cable: 144
 Screws: 1056
 Reinforced Iron Plate: 57
 Modular Frame: 40
 Encased Industrial Beam: 114
 Heavy Modular Frame: 12
 Motor: 30
 Circuit Board: 15
 Computer: 30
 Heat Sink: 7
- Use the above items to rush for Coal Power. It is feasible to have the 600 MW Coal Power up and running before two hours.[1]
- Unlock Tier 2 - Resource Sink Bonus Program first.
- Put the higher tier items into the AWESOME Sink and purchase Rotors, RIPs and Copper Sheets for bootstrapping the Coal Power.
- Produce 50 Smart Platings ASAP with at least four Assemblers.
Visit the marked Crash Sites and pick up the loots.
First Iron Ore
- Look for Iron Ore.
- As we will soon face the dangers, first use the ESC menu to save the game.
- Autosaves are created at 5-minute intervals, and the last three autosaves will be kept in case you need to reload after a death or serious mistake. The interval can be adjusted in 'Options'.
- If you die, you can press ESC and reload the last save.
- Alternatively, click
 to respawn. The pioneer respawns in the HUB or starting area with 30% health, and all items are left back at the point of death (or the last solid ground if you fell into the Void) inside a Crate.
 - In multiplayer, pioneers can revive each other by interacting E with the dead player.
- If the pioneer gets stuck, such as on a tree, you can force-kill the pioneer by clicking 'RESPAWN' in the Esc menu.
- There is no limit on how many times can the pioneer be killed as there is no Game Over in this game.
- Use the Resource Scanner: Hold down V then release it to scan for Iron Ore.
- A blue sphere propagates outwards, and three pings can be heard. The Resource Scanner always indicates the three nearest resource patches of the selected type.
- 'Ore' refers to the type of resource produced.
- 'Node' refers to the disc-shaped terrain feature that produces unlimited amounts of the resource.
- 'Deposit' refers to a rocky outcrop that provides a limited amount of a resource. Deposits can only be mined manually E.
- 'Patch' refers to a group of similar Resource Nodes.
- Their directions and distances are indicated on the compass.
- A blue sphere propagates outwards, and three pings can be heard. The Resource Scanner always indicates the three nearest resource patches of the selected type.
- Ignore all the three results shown. Instead, move northeast about 450 meters, until you see a river. Then, scan again for Iron Ore.
- Move towards the Iron patch located in the northeast direction.
- Use ⇧ Shift to toggle between run and walk.
- Run is faster, however, it scares Lizard Doggos away. Remember not to run when taming them in the later game.
- Use Space to jump and C to crouch.
- Crouch before jumping for a higher and longer jump. Crouch while running downhill to perform a slide.
- Later on there is a piece of equipment that improves the pioneer's mobility.
- Bunny-hopping is slightly faster than normal running. Hold down C and tap the Space when the character returns to the ground.
- To find the location in the image, first look for the small river that divides the desert, then follow the river upstream to the east.
- When you meet several poisonous Spore Flowers in the middle of the river, move north and you will reach the destination.
- There are plenty of leaves and branches on the ground; pick them up E while moving.
- Before reaching the destination, one of the following hostile creatures may be encountered:
 Fluffy-tailed Hog,
  Spitter or
  Flying Crab: Read their pages to learn how to defeat them.
 Alpha Hog or
  Alpha Spitter: We are not ready to fight these yet. If one notices you, run away until it resets back to its spawn location and avoid passing through the same area.
- Use the Resource Scanner V to pinpoint this location as shown below:
- There are three Iron nodes on the rocky steps in the 2nd image. We will reserve the space in front of them for factory buildings. We will build The HUB just a little bit right of the steps.
- The build menu is currently locked until the first Iron Ore is mined.
- Move towards the Iron patch and prepare for combat.
- Read Hog to learn how to kill it.
- Scan V for Iron Ore again.
- Each Iron node is marked with a bright circle. The rocky part on top of that is a resource deposit, which must be manually mined out before a miner can be built on the node.
- Portable Miners are not blocked by these Resource Deposits.
- Approach the Resource Deposit and hold E while looking at it to start mining. Deposits can yield anywhere from a couple of dozen to a hundred of the resource.
- All Resource Deposits are considered 'pure'. They quickly run out when mined and never regenerate.
- Repeat until all three Iron deposits are mined out (once the rocky 'tips' have disappeared).
- To continue mining, aim at the Iron node (the flat disk-shaped thing just below the iron deposit) and press E. This however mines at a much slower rate.
- All Resource Nodes are infinite. Continue reading: Resource Node.
- The center of the screen indicates that the Iron Ore node is 'normal'. This is the node purity that affects mining speed.
- Mine about 80 Iron Ore.
Building the HUB
- Build The HUB below and to the east of the rocky stage.
- In the build menu Q, click on 'The HUB' to select its hologram. Aim at a flat area of ground. Use the
 wheel to rotate it.
  again to confirm the build.
- The HUB - framing is built. We can now work toward completing the HUB.
Tier 0
HUB Upgrade 1
- At the center of The HUB is a Craft Bench. Interact E to use it.
- Observe the various items that we can craft.
- To close the Craft Bench UI, press Esc.
- Across from it is the HUB Terminal. Interact E to use it.
- In its UI there is a selection of Milestones available to unlock. Select 'Tier 0' then click 'Hub Upgrade 1'. Click 'Select Milestone' to confirm.
- See Milestones for a complete list.
- It prompts us to input 10 Iron Rods to complete the milestone. Close the UI Esc.
- Milestone requirements are displayed at the top-right of the game screen.
- In its UI there is a selection of Milestones available to unlock. Select 'Tier 0' then click 'Hub Upgrade 1'. Click 'Select Milestone' to confirm.
- Use the Craft Bench and select Iron Rod. Its option is greyed out, and displays 'Can't Afford Recipe'.
- Hover over the icon below the 'Cost'. It shows that an Iron Rod requires one Iron Ingot to craft.
- Craft at least 10 Iron Ingots. Select the recipe, then click
 and hold the craft button.
- Alternatively, hold Space to craft. You can also press ⇧ Shift+Space to make the game hold the craft button for you. It will stay held even if you click to another recipe. Press ⇧ Shift+Space again to toggle this off.
- Craft all the Iron Ingots we can afford, consuming all the Iron Ore in the inventory.
- Divide half of the Iron Ingots to craft Iron Rods and the other half to craft Iron Plates.
- When done crafting there should be slightly more Iron Rods than Iron Plates.
- Open the HUB terminal and put 10 Iron Rods into it.
- At the top right the 'Relevant Items' are displayed. Ctrl+
 to transfer all the required items into it.
 - Alternatively, drag-click or shift-click to transfer the items.
- At the top right the 'Relevant Items' are displayed. Ctrl+
- Click 'Upgrade HUB'. The HUB Upgrade 1 is now completed.
- Do not rush for HUB Upgrade 2 yet. Use the remaining resources to begin basic automation.
- As a rule of thumb, automation comes before progression.
HUB Upgrade 2
- There are six HUB upgrades.
- A small Personal Storage Box is added beside the HUB terminal.
- We can store items in it to free up some inventory space.
- New unlocked HUB features are marked with an exclamation ! mark.
- Open the build menu Q and build an Equipment Workshop just outside and near the HUB.
- Select 'Production' then click on 'Equipment Workshop'.
- New unlocked buildings are highlighted with 'new'. Mouse hover over them to clear the highlight.
- If the hologram intersects with an existing building, it means it cannot be built there. Observe the red-colored hitbox and move the hologram away from it.
- Observe the building cost of the Equipment Workshop. Building materials are consumed from the inventory.
- If the building materials are insufficient, use the Craft Bench to craft more.
- You can dismantle a building at any time to get back a full refund.
- You can also build additional Craft Benches anywhere.
- Use the Equipment Workshop to craft five Portable Miners.
- Equipment can only be crafted at the Equipment Workshop. Most other items can be crafted at the Crafting Bench.
- Place five Portable Miners on the Iron node:
- Go to the Iron nodes and stand at the center of the nearest node.
- Double-
 to equip the Potable Miner in your hand slot.
- Notice this will unequip the Xeno-Zapper from your hand slot.
- Aim at the Resource Node until it displays 'Press E to mine Iron Ore (normal)', then click
 to place it down.
 - Place the Portable Miners in an arc shape, centered on you.
- For safety, remember to re-equip the Xeno-Zapper.
The HUB and an Equipment Workshop, built near the Iron patch.
Several Portable Miners placed in an arc on an Iron Node.
- After a few seconds, interact E with each of them and click 'Grab All' to take out the Iron Ores.
- From now on we do not have to manually mine ore from the node.
- A Portable Miner stops mining after its output slot is filled with a stack of 100 ore.
- Once you have 100 Iron Ore in your inventory, go back to the HUB.
- Use the Craft Bench to craft the necessary items required to complete the Milestone - HUB Upgrade 2.
HUB Upgrade 3
- The Smelter is unlocked. It smelts Iron Ingots automatically.
- Scanner: Copper Ore unlocked. To craft Wires, we need to mine Copper Ore.
- Use the Resource Scanner (hold V), and a scanning wheel appears. Use the mouse to move around the wheel and select 'Copper', then release V.
- A quick tap on the Resource Scanner key re-scans for the previously selected resource type without popping up the scanning wheel.
- The nearest Copper node is about 200 meters northeast of the base. Bring three Portable Miners.
- Free up at least five inventory slots by storing some items (leaves, wood, Iron Ore) into the Personal Storage Box beside the HUB Terminal.
- There is a Spitter guarding the Copper node; be prepared and exterminate it.
- Mine out the Copper deposit for a handful of Copper Ore, then place three Portable Miners on the Copper node.
- Beside it is a Limestone node. Mine out its deposit too.
- We do not have to place Portable Miners there as there is another Limestone node just in front of our base.
- Find the Limestone node due south of our base by visually looking for it and place three Portable Miners there.
- Behind the HUB is a Biomass Burner. Use Ctrl+
 to put all of the Leaves in it.
- Build a Smelter nearby and connect to the Biomass Burner with a Power Line.
- Interact E with the Smelter, then select 'Iron Ingot'.
- If you wish to craft Copper Ingot, you can switch the recipe by clicking at the top left 'Select Recipe', then click 'Copper Ingot' to change it.
- If a building's recipe is changed, all its contents will be transferred to the Inventory.
- Put 100 Iron Ore into the Smelter. Observe its UI:
- On the left is the input ingredient and the consumption rate.
- On the right is the output product and the production rate.
- Below that is the Power consumption of this building and how much time is required to perform a crafting cycle (in this case, one Iron Ingot).
- After 100 Iron Ingots are smelted, the Smelter stops. Ctrl+
 to take out all the Iron Ingots. Put in another stack of Iron Ore.
- Interact with the Biomass Burner:
- Observe how quickly the Leaves are being consumed. Although it displays '0.8 seconds', each Leaves item lasts for four seconds.
- This is because all Power Generators, including Biomass Burners, consume Fuels proportionally to their Power consumption.
- Currently only 20% of the Power is being utilized (4 MW out of 20 MW). Thus its fuel last five times as long (20 / 4 = 500 %).
- Using the Iron Ingots produced by the Smelter, complete the HUB Upgrade 3.
- Using Smelters to craft Ingots is more effective compared to manual crafting as Ingots generally require multiple crafting clicks (3 each).
HUB Upgrade 4
- Use the Limestone obtained from the Limestone deposit and craft it into Concrete.
- The unlocked Power Pole enables us to connect more Smelters to the Power Grid.
- As
20 MW / 4 MW = 5, five Smelters can fully utilize a Biomass Burner.
- As
- In the build menu, add four Smelters, three Power Poles and seven Power Lines to the To Do List.
- Observe the building material required as displayed in the To Do List window at the right. Craft all necessary material.
- Go back to the respective Resource Node and grab more of the resource from the Portable Miners if required.
- Below the screen is the building Hotbar. You can set up to 10 building hotkeys per hotbar.
- The hotkeys are shortcut keys to build without opening the build menu.
- In the build menu, mouse hover over 'Smelter'.
- Press Keypad 5 to set its hotkey to 5.
- You can set it to other numbers as well, but avoid hotkeys one to four as they are reserved for other buildings.
- You can scroll between 10 different hotbars with Alt +
 scroll.
- Build four additional Smelters, aligned side-by-side with the first:
- Press the hotkey 5 for Smelter.
- Observe the additional control keys as displayed below the screen.
- Notice which keys are assigned to 'Building Eyedropper' and 'Snap to Guideline'. The eyedropper enables us to copy a building's hologram.
- Press and hold the key assigned to 'Snap to Guideline' Left Ctrl and aim the Smelter hologram at the existing Smelter's side surface.
- Use this method to build several buildings in line.
- While snapping, you can use
 wheel to rotate the hologram.
 - Make sure all five Smelters have their belt output facing the front.
- Belt input is indicated with orange dots, while the output is indicated with green brackets.
- Dismantle F the existing Power Line.
- This is the tricky one. A Power Line may visually sag down, but its hitbox is a straight line.
- Aim at the Power Line near the Biomass Burner and dismantle it.
- Build three Power Poles and connect them all with Power Lines as shown below:
- Make use of the hotkeys and customize them for your convenience.
- Ensure each Power Pole is connected to at most two buildings, leaving two connector slots for chaining to other Power Poles.
- Power Poles with more connectors can be unlocked later.
- If a Power Line is connected incorrectly, you can always dismantle it and try again.
- Set four Smelters for smelting Iron Ingots and one Smelter for Copper Ingots.
- If the Biomass Burner stops, collect more Leaves to feed into it (up to 500 at once).
- Complete HUB Upgrade 4.
To add a building to the To Do List, click on the '+' button as shown.
Carefully aim at the existing Power Line to dismantle F it.
Five Smelters in a line, all connected to power. Observe the each Power Pole is connected to at most two buildings.
HUB Upgrade 5
- The Conveyor Belt is unlocked, however, it is not needed yet.
- Continue manually feeding the ores into the Smelters for Ingots.
- Rush for HUB Upgrade 5.
- Additional Limestone can be obtained from the Limestone node in front of the HUB; remember to place Portable Miners on it.
HUB Upgrade 6
- The second Biomass Burner is added to The HUB. Connect it to the Power Grid.
- Build a Power Line between it and the nearest Power Pole. Observe its Indicator Light is showing Red.
- Further reading: Indicator Light
- Feed it with Leaves. Its indicator color turns green, meaning that it is running without any problems.
- We will build five Constructors in front of the Smelters, and connect them one-to-one. This acts as a temporary production area.
- Add five Constructors to the To Do List.
- Estimate how many Power Poles are needed for the Constructors; we need a Power Pole for every two buildings.
Ceiling (5/2) = 3. We need three Power Poles. Add them to the To Do List.- Add another 10 Cables.
- Add 50 Conveyor Belts. A unit of Conveyor Belt is two meters long.
- Constructors require Reinforced Iron Plates (a.k.a. RIP) which is quite complex to hand-craft at the moment. Thus we add their ingredients to the To Do List as well:
- Open Codex X, the in-game simplified encyclopedia.
- Click Recipe -> Parts -> Reinforced Iron Plate, and it displays
6 Iron Plate + 12
  Screw = 1
  Reinforced Iron Plate
 - Hover with the mouse its recipe, then click 'Add to To Do List' until 10 RIP are added to the list. Hold down ⇧ Shift to add 10 at once, or edit the number in the text box and press ↵ Enter.
- The ingredients (60 Iron Plates and 120 Screws) are automatically added to the list.
- You can mouse-scroll the To Do List to see the additional rows of items hidden below.
- Alternatively, an item's recipe can be viewed by using a Craft Bench.
The Codex Window X. Mouse hover the RIP recipe and add 10 RIP to the To Do List.
Build a Constructor in front of the middle Smelter and snap Ctrl to it. A thick turquoise line indicates that the buildings are aligned.
- Manually craft all the material required to fulfill the To Do List.
- It might seem like a lot of work compared to manual crafting all the way to HUB Upgrade 6, but this is an investment that will benefit in the long run.
- Set a hotkey for Constructor and make use of it.
- Stand in front of the middle Smelter, hold the 'Snap to Guideline' key Ctrl and aim at the ground some distance away.
- Build two Constructors each to the left and the right of the middle Constructor, using the snap key.
- Connect each Constructor with a Smelter using Conveyor Belts. If a Power Pole is in the way, dismantle the Power Pole.
- If the belt is too long, additional Iron Plates will be required.
- If you cannot connect the belts between them, check if the building belt input and output are rotated correctly.
- Connect all buildings with Power Poles and Power Lines.
- Set the Constructor in front of the Copper Ingot Smelter to 'Wire', the next for 'Iron Rod', and the remaining three for 'Iron Plate'.
- Feed the Copper and Iron ores into the Smelter and observe the finished products to be produced in the Constructor.
- Lots of leaves will be required to keep the Biomass Burners running.
- When gathering the leaves you may run into more hostile creatures.
- Our first bootstrap factory is completed, however, this setup is only temporary.
- Open the build menu, then click 'Clear List' on the right side to remove any leftovers in the To Do List.
- Complete HUB Upgrade 6.
Tier 1 and Tier 2
- Immediately remove all the leaves from the Biomass Burners.
- Craft them into Biomass, then insert the Biomass into the Biomass Burners. They burn much longer as they contain much higher fuel value.
- Interact E with any of the Power Poles or Biomass Burners and pull down the lever at the left to reset the power trip.
- If the Power trips again, make sure there are a sufficient number of power generators and each generator has fuel in it.
- Observe new buildings unlocked:
- Biomass Burner - We will build 12 of them, in addition to the two mini burners attached to The HUB.
- Space Elevator - Used to unlock Tier 3 Milestones and above, the most important being Tier 3 - Coal Power.
- Our next long-term target is to set up proper Coal power which will relieve us from the Biomass power generation.
Speedrunning
- This section is only for the players performing speedrunning up to 2nd Space Elevator delivery. Skip this section if you are playing for the first time.
- This section is to be read in conjunction with the previous section: #Loot for thought.
- Start at Rocky Desert, immediately head for the Iron node at the West (below the rocky shade), and rush for HUB Upgrade 1, while avoiding Flying Crabs at all.
- This will expands the inventory size from 16 to 19, which is important for Crash Site looting.
- Don't forget to dismantle The HUB to get back the HUB Parts, as our actual starting location will be at the six pure Iron nodes in the Northern Forest.
- Visit the Lizard Doggo cave below the Dangle Spires and loot the items on the ground.
- Visit the Crash Sites at Rocky Desert and Lake Forest as well, as we move towards the actual starting location.
- Avoid looting biomass during this stage, as they take away inventory slot and biomass is abundant in the Northern Forest.
- Make sure not to miss out on any Crash Site containing RIPs and Modular Frames.
- Automate the production of RIP and Rotor ASAP, 20 / min each is recommended. To do so you will need Conveyor Belt Mk.2 to fully utilize a pure miner.
- Skip Coal Power as they take away a large chunk of RIP and Rotor, which should be dedicated to Smart Platings instead.
- You will need a lot of Assemblers crafting Smart Platings, but don't forget Versatile Framework and Automated Wiring.
- By sinking the loots of various Crash Sites you should be able to convert them into at least 35 coupons, sufficient for skipping the Steel chain completely.
- Two Coupons for 200 Steel Pipes for unlocking Advanced Steel Production.
- Three Coupons for 100 Stators.
- 30 Coupons for 3000 Steel Beams.
- Automate the production of Solid Biofuel as you will solely rely on Biomass Burners, and you will need to build a lot of them.
- It is highly possible that the 2nd delivery can be completed in under four hours, as the writer of this page managed to perform it at 3h5min. [2]
- Practice makes perfect. Have fun!
Logistics
- Craft 100 Concrete at the Craft Bench.
- Grab the produced items (Iron Rod, Iron Plate, Wire) from the bootstrap factory and complete Tier 1 - Logistics.
Obstacle Clearing
- We will now set up an improved starter factory.
- Remove the Portable Miners on the Iron Node and put the ore into the Smelters.
- Add one Miner Mk.1, two Splitters, two Smelters, four Constructors and three Storage Containers to the To Do List.
- Estimate the amount of Power Poles, Power Lines, and Conveyor Belts required to connect the buildings.
- Build a Miner Mk.1 at the right-most Iron node which is nearest to the HUB.
- Build two Smelters in front of it with one of the Smelters aligned Ctrl with the Miner. Set both to smelt 'Iron Ingot'.
- Connect the aligned Smelter and the Miner with a belt.
- Aim a Splitter at the middle of the belt and build it.
- Connect a side output of the Splitter to the second Smelter.
- The other output of the Splitter will not be used. Leave it unconnected.
- These are the basics of splitting a belt. Further reading: Splitter
- Observe E the UIs for the Miner and a Smelter.
- A Miner Mk.1 produces 60 Iron Ore per minute. Continue reading: Miner Mk.1
- A Smelter requires 30 Iron Ore per minute. Continue reading: Smelter
- As
60 / 30 = 2, a Miner Mk.1's output is sufficient for two Smelters. - In some cases you may get decimals. In that case, always round up (ceiling).
- Build the Constructors as shown below. Connect them with belts and power. Set their recipes as shown in the schematic.
- For more complex production lines, use Online tools to assist you.
- Troubleshooting:
- Cannot connect belts to buildings - Make sure the building is aligned and rotated properly. Buildings and belts have orange arrows for input and green arrows for output in their holograms.
- Encroaching other's clearance - Move the buildings around and ensure there is sufficient space in-between. Take note of the hitbox highlighted in red when the encroachment warning appears.
- Estimate the power usage and expand the power infrastructure accordingly:
- Build an additional four Biomass Burners near the initial two Biomass Burners.
- Link them all to the same Power Grid for easy management.
- Have a Storage Container nearby for storing all the Leaves, Woods and Biomass for easier refill.
- Optional: build a Constructor for converting Leaves to Biomass with a Container on each end.
- Once the Iron Rods, Iron Plates, and Screws Storage Containers start to fill up, dismantle the old bootstrap factory and replace it with eight additional Biomass Burners.
Aim the hologram of the Splitter at the middle of the belt connecting the Miner and the Smelter.
Connect the second Smelter to the Splitter with a belt. Ignore the other output of the Splitter, it is unused.
Starter factory producing Iron Rods, Iron Plates and Screws.
Build additional Biomass Burners to increase the Power capacity. Have a Constructor crafting Biomass automatically.
- Make a similar setup, tapped from the center Iron node. This doubles the production rate of Iron Plates, Iron Rods, and Screws.
- 'Tapping a node' means building a Miner on top of a node and mining its resources.
- At the Copper node, build the following:
- Use both of the Limestone nodes nearby to produce Concrete.
- Manually calculate how many Contructors are needed for each node.
- Open up the search function N and type the following:
60 / 45, and observe the result= 1.333. - Take note that the max item flow rate is limited by the belt speed, measured in items/min. The speed of a belt can be viewed in the build menu.
- We will need lots of Concrete to make Foundations, so start piling them up for Tier 3.
- Open up the search function N and type the following:
- The power grid might trip during this process. To avoid this, refuel the Biomass Burners regularly.
- Complete Tier 2 - Obstacle Clearing.
Part Assembly
- Craft a Chainsaw in the Equipment Workshop then equip it.
- At the bottom left, a warning displays that Solid Biofuel is missing from the inventory.
- A Chainsaw requires Solid Biofuel to operate. Craft some Solid Biofuel at the Craft Bench.
- Saw down all the trees nearby and craft them into Solid Biofuel; automate this process with Constructors. Manual crafting can take a longer time.
- Avoid cutting the Nut tree and Berry flower, as their fruits regrow every three days (150 minutes in real-time).
- Set up two individual lines: Storage Container (Leaves) - Constructor (Leaves -> Biomass) - Constructor (Biomass -> Solid Biofuel) - Storage Container. The other using Biomass - Wood.
- Replace the Biomass in your Biomass Burners with Solid Biofuel as it is more energy-efficient.
- Continue reading: Biomass_Burner#Conversion
- Complete Tier 2 - Part Assembly.
Base Building
- Use the third Iron node to set up the production for RIP and Rotor:
- For the Rotor setup, additional Iron nodes are needed. Use the Resource Scanner to find more Iron nodes.
- There are four Iron nodes located 500 meters west of the base. Find them and use belts to bring the Iron Ore back.
- Build another copy of the above RIP and Rotor setup using the remaining available Iron nodes.
- Combine them with an Assembler to produce Smart Plating.
- Make a production line for Copper Sheet. They will be used in Coal Power later on.
- Add a Miner Mk.1 to the To Do List and prepare plenty of Iron Plates in the inventory.
- Go West until you see a river. Follow the river downstream to the far West.
- Construct Power Lines as you move on.
- There are plenty of Copper nodes by the sea; use one of them for Copper Sheet production.
- Either build locally (close to the node) or centralize the production (bring the ore back to the base). Either way, the Storage Container for storing the Copper Sheets should be built near the base.
- As a rule of thumb, whenever a new recipe is unlocked, try to automate its production ASAP. Keep manual crafting at a minimum.
- Complete Tier 1 - Base Building to unlock Foundations.
Field Research
- Starting from Tier 1, there is a cooldown after completing each milestone. Its timer is displayed at the top right.
- While waiting for the cool down, we are going to collect a Power Slug southwest of the HUB. Save the game.
- Move South towards the river and find the Power Slug. It is located on a small island in the river.
- Find the football-shaped stone and collect the Green Power Slug from the crack. Quickly pick it up before the Spore Flower starts to release Poison Gas.
- Store the Power Slug in the HUB's Personal Storage Box.
- Complete Tier 1 - Field Research.
Logistics Mk.2
- Build the MAM somewhere near the HUB.
- Research all the options currently available. Read more: MAM
- Start with the 3-second researches, then progress to the longer researches.
- Prioritize unlocking Overclocking, Slug Scanning, Flower Petals, Color Cartridges, and Nuts Scanning.
- A second-hand slot can be unlocked. Drag and drop the Nuts to the 2nd hand slot to equip them.
- Craft an Object Scanner in the Equipment Workshop and equip it.
- Right-click until it displays 'Power Slugs' on its UI, or by looking at the bottom left.
- Find at least one more Power Slug using the Object Scanner, then craft them all into Power Shards at a Craft Bench.
- Review our Concrete setup at the Limestone node:
- You are probably using a one Miner - two Constructor - one Storage Container setup.
- If not, go back and read Obstacle Clearing.
- To match the consumption of Limestone in the Constructors with the production of Limestone in the Miner, there are a few approaches:
- Underclock the higher (60 Limestone Production, 60 Limestone Consumption) by setting both Constructors to 67%.
- Overclock the miner (90 Limestone Production, 90 Limestone Consumption). Insert a Power Shard into the Miner Mk.1 then overclock it to 150%. Check that the production ratio matches.
- As the belt speed is currently limited to 60 items/min, avoid overclocking now.
- Where there are decimals, always round up the number instead of rounding it down. For example,
66.6% -> 67%. - Overclocking a building will increase its power consumption, and vice versa.
- Check the Rotor and Reinforced Iron Plate Assemblers and underclock them accordingly.
- Further reading: Clock Speed
Underclocking performed at the Concrete Constructor. Type in numbers at the clock speed % or items/min, or use the slider.
Overclocking at the Limestone Miner. Power Shards are required for overclocking beyond 100%.
- Complete Tier 2 - Logistics Mk.2.
Project Assembly - Platform
- Find a large open space and build the Space Elevator, if you have not yet built it.
- Building sizes can be viewed on their individual wiki pages. For example, look at the infobox of Space Elevator and observe its Length, Width, and Height in meters.
- A foundation is eight meters long x eight meters wide.
- As the Space Elevator is not frequently used, we can build it some distance away.
- The first space delivery requires 50 Smart Platings.
- Increase the production of Smart Plating to reduce the waiting time, either by overclocking or building more machines.
- Either deliver the material manually (by interacting) or use a belt connection.
- Once the requirements are met, pull down the lever (Load -> Seal -> Send) and send the package. Observe the Space Elevator's delivery animation.
- It is not compulsory to complete all Tier 1 and Tier 2 milestones before unlocking Tier 3. For now, we will skip the Jump Pads and Resource Sink Bonus Program for later.
Tier 3 and Tier 4
Coal Power
- Dismantle the Assemblers producing Smart Platings. We will not need them for a while.
- Connect the 2nd set of RIP and Rotor outputs to Storage Containers to buffer their products.
- Complete Tier 3 - Coal Power.
- We need many RIP and Rotors to complete this milestone. Luckily, we have automated their production to have the material ready to go.
Setting up the Coal power
- We are ready to set up a fully-automated power production with Coal Generators.
- Once it is set up, we can get rid of all the Biomass Burners. Say goodbye to tree-cutting!
- Scan V for Coal. It is located at some distance East of the base.
- Add eight Coal Generators, three Water Extractors and two Miner Mk.1 to the To Do List.
- In addition, prepare plenty of Concrete, Cables and Copper Sheets.
- Save the game.
- Move towards the Coal patch. Keep left to avoid the Poison Gas. You will come across a Crash Site.
- Loot the items laying around.
- Use nine Modular Frames, which you just looted, to unlock the crashed FICSIT Freighter and retrieve the Hard Drive.
- Build a MAM there and research the Hard Drive. Further reading: Hard Drive
- You don't have to wait for the research to complete, we will look into it later. Dismantle the MAM and proceed to the Coal patch.
- There are plenty of Coal nodes there. Tap the two nearest to the river delta.
- There is an Alpha Hog guarding the island in the middle of the river, approach with care, and kill it.
- Across the delta, use Foundations to build a 12 x 4 platform, near sea level.
- 'Foundation' refers to the individual tiles that you can build. 'Platform' refers to a group of foundations on where you or the factory resides.
- Ensure the long side is fully in contact with deep water.
- Build a pier-like structure to link the platform to the land.
- Whether to use Foundation 8m x 4m, 8m x 2m, or 8m x 1m is up to your preference.
- Build eight Coal Generators in a row. Connect them in Manifold style, four in each group.
- The first four generators receive Coal from the first belt; the remaining take from the second belt.
- Build Stackable Conveyor Pole near the 1st and 4th Splitter.
- Stackable Conveyor Pole is unlocked at Tier 2 - Logistics Mk.2.
- Build the 2nd belt above the 1st belt, snapping on the Stackable Conveyor Pole, as shown below.
Coal nodes nearby the water body are useful for setting up the Coal Power.
Connect belts to Coal Generators in a manifold style, four in a group. Coal input from the bottom right.
Use Stackable Conveyor Pole to elevate a belt so they can stack on top of each other.
- Build a Pipeline Junction Cross in front of each Coal Generator's pipe connector; avoid colliding with belts and splitters.
- Let's label these Junctions one to 8.
- Build additional Pipeline Junctions in between junction two and three, four and five, six and seven. Let's name them A, B, and C.
- Connect all the Junctions and Coal Generator pipe inlets with Pipelines.
- Extend the ladder or Stackable Conveyor Pole near the 4th Splitter as shown, up to 15 segments high (30 meters), then climb up and look towards the water.
- It is much easier to build Water Extractors while standing at a higher elevation, as the hologram is centered at the underwater point aimed at by the cursor.
- In front of each Pipeline Junction A to C, carefully place a Water Extractor with its pipe outlet facing the Junction.
- Water Extractors cannot be snapped to guidelines, so we have to manually adjust their placement.
- When building Water Extractors side by side, look carefully at the bottom far corner of the encroachment box. Build them as close as possible, but not encroaching on each other.
- Connect Water Extractors to the pipe network.
- Dismantle the tall ladder, except the bottom-most segment.
- Connect the belts between the manifold input and the Coal Miners.
- Connect the Power Lines between Coal Generators, Water Extractors, and Miners, but don't connect them to the main Power Grid (at the base) yet.
- Prime the system with three Biomass Burners:
- Manually mine 100 Coal and fuel any Coal Generator we have built.
- Temporarily build three Biomass Burners somewhere nearby, connect them to the Coal Power, then fuel them with some leaves nearby.
- Once the system is up and running, dismantle the Biomass Burners.
- Check the system by interacting with a Power Pole; it should display a Power capacity of
8 * 75 MW = 600 MW. If not, look at the Coal Generators' / Water Extractors' Indicator Lights and check which building is not running.- A Red indicator means the building is not working properly. Check the belt, power, and pipe connections.
- Connect the Power Line from the Coal Power back to the base.
- As the path back to the base is mostly blocked by cliffs, we need to find a way to climb it up.
- We can build ladders with the Stackable Conveyor Pole.
- We can build a Conveyor Pole at the low ground, a splitter at the edge of the cliff at high ground, then connect them with a belt. Walk on the belt to climb up.
- If the Splitter is in your way, remove it before climbing up.
- If the belt has the same direction as your travel direction, walking on it will give a speed boost.
- If the belt is against your travel direction, it can slow you down. Walk on the belt's edge (the railing part) to avoid being pushed back.
- Alternatively, you can walk around the cliff; this may take a longer time to travel across.
Connect Coal Generators with belts and pipes. Observe the position of Pipeline Junction Cross.
Build ladders at the middle of the setup. Climb on it for easier placement of Water Extractors.
Build Water Extractors, aligned with the three Junctions as shown.
Using a belt, a Conveyor Pole and a Splitter for climbing up a cliff.
- Once you have returned to the base, dismantle all the Biomass Burners there.
- The two mini burners at the HUB cannot be removed. Just leave them unfueled.
- Congratulations! From now on we are no longer required to cut down trees or bushes to fuel the Biomass Burners again. The Coal Power (600MW) should last for a while.
- Our next long-term target is to unlock Tier 5 and Tier 6. We will proceed to build Steel Production for that.
- Further reading: #Coal Power 2
Blade Runners
- Check the MAM. The research of Hard Drive should be completed by now, prompting you to pick one Alternate Recipe among 3.
- Read here for more info.
- We will now get a pair of Blade Runners for improved movement speed and jump.
- From the HUB, look South and find the small cliff as shown below.
- Get there and kill the Flying Crabs in your way.
- Use the belt trick to climb up the cliff as mentioned before. You can use Ramps too.
- Mine 210 Caterium Ore manually or with a Portable Miner.
- Remove the Portable Miner, then build a Miner there.
- Use a belt to bring the Caterium Ore down the cliff and connect it to a Smelter, then a Constructor, followed by a Storage Container.
- If 'too steep' warning is displayed, use Conveyor Lift to transport items vertically.
- Connect the Power Lines.
- Look at the Caterium Research in the MAM. Unlock Caterium, Caterium Ingot and Quickwire.
- Once the recipes for Caterium Ingot and Quickwire are unlocked, set the Smelter and Constructor that you just built to automate them.
- 'Automate' refers to automated production, mostly using machines.
- Now you have a steady production of Quickwire; continue researching down the Caterium Research tree until you unlock the Blade Runners.
A simple Caterium production involving Miner Mk.1, Smelter producing Caterium Ingot, Constructor producing Quickwire and a Storage Container.
- Craft a pair of Blade Runners and equip it. Enjoy the faster movement speed and improved jump height.
- Unlock Power Pole Mk.2 as it has 7 connectors instead of 4.
- Reserving two for chaining Power Poles, this leaves us five power connections available for buildings.
- Set its hotkey as one to replace the Power Pole hotkey.
- Power Poles and Conveyor Belts can be upgraded in-place, similar to Miners. Aim the hologram of the Mk.2 pole at the Mk.1 pole to upgrade it.
- Revisit the North-West area with four pure Iron nodes. Tap all of them if you haven't done so.
- We have seven Iron nodes now. After subtracting the 4.5 belts we have been utilizing for the automation of RIP and Rotor, there are still 2.5 belts of Iron Ores left.
- Set up the Modular Frame production as shown.
- it is advised to use your own creativity or refer to online calculators to plan the layout.
- Check through the buildings in the chain and underclock where necessary.
Starter setup for Modular Frame production. Several buildings need to be underclocked.
- We are going to double up the Power production very soon. Until then, avoid overbuilding.
Improved Melee Combat
- Complete Tier 4 - Improved Melee Combat.
- Un-equip the Xeno-Zapper.
- Craft a Xeno-Basher then equip it. It has longer range and higher damage compared to the Xeno-Zapper.
- Further Reading: Xeno-Basher
Map
- Complete all the possible researches in the MAM with material available, especially those that increase inventory size.
- Bring plenty of Beryl Nuts, you will need them for healing later on, as well as several Portable Miners.
- Read Stinger to learn how to kill them.
- Go to where you have set up the Coal Power. From the Coal nodes and look West, find the cave entrance covered with vines as shown below.
- Open the flashlight B then enter the cave.
- There are some reddish mushrooms on the cave floor, called Mycelia. Use a Chainsaw to cut them down for Mycelia Research.
- While cutting, some stones will also be removed, transferring Limestones into the inventory. Drag the Limestones to the trash slot to delete them, this will free up inventory space.
- There are
 Stingers guarding the cavern. If you move in too fast you will aggro all of them at once. Move forward slowly, aggro one at a time to kill them one-by-one.
 - After the cavern is a fork. The smaller cave on the right leads underwater which contains a Yellow Power Slug.
- Go to the left to advance.
- There are several Large Stingers guarding the Quartz node. Kill them.
- Place seven Portable Miners on the Quartz node and mine 700 Raw Quartz.
- A fog might start to appear in the meantime, reducing visibility.
- It is advised to wait until the fog dissipates.
- There are several Power Slugs on the ceiling of the cave. It is advised to collect them after unlocking the Jetpack at Tier 6.
- Alternatively, build ladders to reach them.
- Continue moving West until you see the 2nd Quartz node. Place a Miner down and connect it with a Power Line.
- Do not connect the belt yet; we will return here later after the Conveyor Belt Mk.3 is unlocked.
- Return to the first Quartz node and pick up all the Portable Miners. Keep the Raw Quartz in the inventory and delete the excess Portable Miners.
- Build a Miner on the first Quartz node and connect it with power. Extend the Power Line from both Miners to the cave entrance and connect them to the main Power grid.
- Return to the base.
- At the MAM, look at the Quartz Research.
- Unlock all the way down to Crystal Oscillator.
- Build three temporary Constructors crafting Quartz Crystals then connect both their inputs and outputs to Storage Containers.
- Once it is done, remove them.
- Use all the Quartz Crystals to craft Crystal Oscillators, then research Signal Technologies and Frequency Mapping. Wait for the research to complete.
- Congratulations! The Map is now unlocked. Press Z to use it.
Resource Sink Bonus Program
- Complete Tier 2 - Resource Sink Bonus Program.
- Near the HUB, build a Storage Container connected to an AWESOME Sink. Provide Power to the Sink.
- Use the Computer that we have looted from the Crash Site earlier, custom-split it
 and insert only two Computers into the Container.
- Items from the Container will be transported to the Sink and get destroyed. Points are rewarded according to the item's complexity. They are needed to print FICSIT Coupons.
- At the AWESOME Sink, click 'Print Coupons' and Ctrl+
 to take out the Coupons:
- Build an AWESOME Shop.
- Purchase Double Ramp Pack, Foundations Expansion Pack, and Walkways. The rest is up to your preference and availability of Coupons.
- At the top right, click 'Cart' then 'Buy All'. New unlocked buildings can be found in the build menu.
- Double Ramp snaps to each other without the need of building a Foundation in-between, which is much more convenient than a normal Ramp.
Coal Power 2
- Revisit the Coal Power. There are two more untapped Coal nodes nearby.
- Use them to double up the Power production to 1200 MW.
- When constructing Power Line from an existing building or Power Pole, and if aimed at its endpoint on a ground, an additional Power Pole hologram is automatically included.
- After click and confirm the building, a Power Pole will be built along with the Power Line. We can then aim the Power Pole Mk.2 hologram at it to upgrade it in-place.
- You don't have to prime this setup, just hook the Power Line to the main power grid.
- Same applies to all future Power extensions.
- However, if your factory experiences a power trip, it might need to prime the entire system, using lots of Biomass Burners.
- During the priming process, disconnect the Power Line between the Power generation area and the main factory.
- There is another Coal node on the hill opposite the river. We will reserve it for Sulfur production chain later.
- Further reading: #Coal Power 3
Basic Steel Production
Advanced Steel Production
- From the base, scan for Iron Ore, then quickly scan for Coal. Open the Map Z and look where both the Iron and Coal are located close together.
- We wisest put up the Steel production there, on a floating platform.
- Proceed to the location as shown below, position yourself between the Coal and Iron nodes.
- Pick any rock or cliff as the anchor point and build a rectangular floating platform (minimum 10 x 15 foundations) that will be supporting our Steel production.
- The platform is to be positioned lower than the Coal node, but higher than the Iron node.
- Build Walkways or Ramps as to provide access for climbing up.
- The Coal nodes are on top of the grassy cliff. To reach them, build Double Ramp 8m x 8m towards it.
- Tap all three Coal nodes and lay Conveyor Belts down the ramp.
- Conveyor Belts can be built on top of each other or even on top of other buildings.
- Tap all three pure Iron nodes. Use Conveyor Lifts to bring up the ores from the lower ground.
- Build the starter Steel production as shown and connect all six input belts to the Miners.
Use a cliff as the anchor point, build Glass Foundations to form a platform. Build Walkways to climb onto it.
The Coal nodes are located above the cliff. Build a long Ramp to it with Double Ramp 8m x 4m.
Build Conveyor Belts and Power Lines down the Ramp. Conveyor Belts can be stacked on top of each other directly.
Chain multiple Conveyor Lifts to span higher rise or drop.
Starter Steel production in-game. The screenshot was taken with Photo Mode while standing on a tall ladder.
- Although it may look complex at the first sight, this is just a method of splitting 3 * 60 belts into 4 * 45 belts.
- Each belt segment is limited to 60 items/second.
- Belts can be built intersect with each other without encroachment issue.
- Once sufficient Steel Pipes are obtained, complete Tier 4 - Advanced Steel Production.
- While waiting for the Steel Pipes to pile up, search for more Power Slugs until you have at least 12 Power Shards in hand.
Logistics Mk.3
- As there is no cooldown for the Advanced Steel Production milestone, proceed to unlock Tier 4 - Logistics Mk.3.
- Overwrite the hotkey 3 with Conveyor Belt Mk.3 for improved belt speed.
- Notice that we have skipped Conveyor Belt Mk.2 as RIP is too expensive to be mass-produced.
- Use Conveyor Belt Mk.3 from now onwards.
- As we are limited by the amount of Steel Beam, do not hurry to upgrade all existing belts to Mk.3 until we have increased production of the Steel Beams.
- Revisit Steel production area.
- There are four Constructors producing Steel Pipes, change one of those into Steel Beam, then dismantle the one beside it.
- Take note: a Steel Beam Constructor consumes 60 Steel Ingots/min.
- There are two normal Limestone nodes nearby; use them to produce Concrete, then combine it with 15 Steel Beam / min to produce 3.75 Encased Industrial Beam / min.
- Underclock the EIB Assembler to 63%.
Nobelisk Detonator
- Scan for Coal then proceed to the highlighted position in the map below. It is located opposite the river from the Coal Power.
- Build a floating platform there and start the Sulfur production chain.
- Tap the pure Coal node, then move southeast into the misty Northern Forest until you see two yellowish, Sulfur nodes.
- Manually mine 60 Sulfur.
- Tap both nodes and combine them into a single Mk.3 belt, then pull the belt back to the platform near the Coal node.
- Build a MAM then unlock Sulfur and Black Powder.
- Build six Assemblers to produce 45 Black Powders/min and connect their output to a Storage Container.
- With the Black Powder, unlock Nobelisk and Nobelisk Detonator.
- Further reading: Nobelisk Detonator
- Continue to research the Sulfur Research Tree; lookout for those that expand inventory and hand slots.
Set up the Black Powder production at the area marked with the cyan rectangle. Bring Sulfur from the yellow circled area.
Black Powder production with Miner Mk.1 and Conveyor Belt Mk.3, built in a Manifold style.
Vehicular Transport
- Complete Milestone Tier 3 - Vehicular Transport, which unlocks Tractor and Truck Station.
- We will not be using them in this guide, feel free to try them out yourself.
Coal Power 3
- We are going to further quadruple (actually, 4.5x) the existing Coal Power to 5400 MW. This will allow us to begin some large-scale production.
- Add four Miner Mk.2, 56 Coal Generators, and 22 Water Extractors to the To Do List.
- You may need to travel multiple times due to the sheer amount of building material involved. Build some Personal Storage Boxes at the construction site for storage.
- Upgrade all four Coal Miners to Mk.2. The cost of the Mk.1 Miners will be refunded to you.
- Overclock all Miners to 225% for 270 Coal/min, which is equal to the throughput of Conveyor Belt Mk.3. Don't upgrade the belt yet.
- As the water area around is limited, if we continue to expand using the same method, the water surface will soon be fully covered.
- This, in turn, reduces the number of Water Extractors we can build.
- To conserve the water surface area, we will build a floating platform to house the new Coal Generators instead. We can then build Water Extractors below that.
- Alternatively, you may expand into the sea by simply copying the previous design. In that case, you can skip all the steps below. Remember to use Mk.3 belts.
- Build two rows of Foundations and some Pipeline Junction Crosses aligned with Water Extractors as shown below. Junctions should be 20 meters apart, each row positioned three meters from the Foundation centerline.
- We will refer to these as the 'lower' platform. It should be positioned at least at the same height as the water level, or slightly above it; refer to the image below.
- Temporarily build a Lookout Tower and stand on it for easier placement of Water Extractors.
- As a Water Extractor is 17 meters high, we need to build the floating platform at least 18 meters above the lower floor (17-meter clearance + one meter Glass Foundation thickness).
- If you wish to use Foundations with more than 1-meter thickness, you may need to raise them further to achieve the 17-meter vertical clearance.
- From the ground foundation, stack nine Foundation 8m x 2m vertically as a temporary support/measurement. Build an 8 x 12 platform from there, then build a Jump Pad to go up.
- Remove the temporary support and build a U-Jelly Landing Pad nearby. Power both the Jelly and the Jump Pad.
- When falling from above, land on the green jelly part of the Landing Pad. Adjust the position of the Landing Pad where necessary.
- Pioneers receive no fall damage when falling onto the U-Jelly Landing Pad or deep water.
- Be creative as there are many options for vertical travel.
- Place two rows of eight Coal Generators each on the floating platform as shown. Opposing generators should be aligned based on their belt connector's position.
- Connect Pipelines in groups of four Coal Generators each.
- Connect all Coal Generators with Conveyor Belt Mk.3.
Building Foundations on the sea level. If the water covers the foundation, move up the foundation such that it is positioned above the water level.
Build a Lookout Tower for easier placement of Water Extractors.
To build a floating platform 18 meters above the water, stack nine Foundations each two meters high to measure.
Using Jump Pad and U-Jelly Landing Pad as a way to travel vertically.
Connect all Coal Generators to the same belt. Connect them with pipes, four in each group.
- Move outside the setup, build a Lookout Tower nearby, and climb onto it. From there, build a pipe from the end of the lower pipe to the end of the upper pipe using Vertical Build mode.
- While building, press R to cycle through different build modes.
- In vertical build mode, the vertical part is always generated at the endpoint. If you build in reverse, you will get the encroachment warning.
- Pipelines can clip through Foundations, Belts, and other Pipelines.
- Repeat for all four endpoints of the pipe, for a total of four riser pipes.
- Power the Water Extractors and the Coal Generators. Do not rush to connect the belt from a Coal Miner; we will focus on the pipes first.
- Let the Water Extractors run for a while, then interact E with the lower Pipelines and the upper Pipelines to check their status:
- The lower Pipelines are mostly full of Water, while the upper Pipelines are empty. This is due to insufficient head lift.
- 'Head lift' refers to a building's ability to push fluid upwards.
- Most buildings with a pipe output (including Water Extractor) have a head lift of 10 meters. Pipeline Pumps have 20 meters of head lift.
- The head lift is counted from the preceding building/pump center point. The effect of head lift does not stack.
- As the vertical pipe is 18 meters high, one Pipeline Pump is sufficient for each vertical pipe.
- Pick a riser pipe (the vertical part of a pipe) and build a Pipeline Pump near its lower part.
- Rotate the Pump's hologram and make sure its arrow is pointed upwards (the back of the pump pistons will point down). Power the pump.
- Check if the upper Pipeline is receiving Water. If not, check the Pump's placement.
- Build Pumps to all remaining riser pipes and make sure they are all working.
- You can check the upper pipe's fluid content even when standing below, as the Glass Foundation is transparent. There are flow indicators at the center of each long pipeline.
- Further reading: Pipeline#Flow Indicator
- Pick one of the Miners, disconnect it from the existing Coal Power, and divert the belt to the new Coal Power setup. Use Conveyor Belt Mk.3.
- A Coal Generator consumes up to 15 Coal/min, and we have 16 of them. As
15 x 16 = 240 Coal /min, we can still add two more Coal Generators to the end of line to fully utilize the 270/min of the Mk.3 belt. - Add two more Coal Generators, then add a Water Extractor and a Pipeline Pump. Connect them with a 5th Pipeline. Connect all the infrastructure.
- 'Infrastructure' refers to Belt, Pipe, and Power Connections.
- Climb onto one of the Coal Generators and check if all the Coal Generators' Indicator Lights are green. If any of them show red, check their connection.
- Once it is up and running, build three more copies of these, let them run, then dismantle the old Coal Power.
- The Power capacity is now 5400 MW. (
4 * 18 * 75 MW = 5400 MW)
Adding a Pipeline Pump on a riser pipe to reset its head lift to 20 meters, measured from the pump's center.
Add two more Coal Generators to the end of line to fully utilize 270 Coal / min on a Mk.3 belt.
Hyper Tubes
- Complete Tier 4 - Hyper Tubes.
Steel Production 2
- Revisit the Steel production area.
- There is one unused normal Limestone node and one pure Copper node nearby. Tap them both.
- We have three Coal Miners, three Iron Miners, three Limestone Miners, and one Copper Miner here.
- Overclock all Miners such that each of them produces 270 / min. Collect more Power Slugs to craft Power Shards.
- You can collect Power Slugs after building the factory—there is no rush to do it now.
- Dismantle the current Steel production. Store the excess material in Personal Storage Boxes. Expand the platform to 28 x 23.
- If you run out of building space, build more Foundations.
- We will build a Hyper Tube to move up and down the platform:
- Build a Hyper Tube Support at the edge of the platform.
- Build a Hyper Tube from the upper Hyper Tube Support and click its endpoint at the ground. Another Hyper Tube Support will be automatically added at the end.
- Build a Hyper Tube Entrance at both ends of the Hyper Tube and Power both of them.
- Optional: Build another long Hyper Tube, connecting the base and the Steel production area.
- Use an Online Calculator to adjust the target production such that it does not exceed both the Coal and Iron mining capability.
- Based on the surrounding nodes, the mining rates are Coal: 810/min, Iron Ore: 810/min, Copper Ore: 270/min, Limestone: 450/min.
- Further reading: Tools
- Setup the improved Steel production area as shown:
- If you have unlocked Alternate: Solid Steel Ingot from Hard Drive, go ahead and use the alternate recipe. It is more resource-effective.
- In this guide, we will stick to the original recipe, at least until Tier 6.
- Observe that some of the Limestone capacity is not fully utilized. In that case, remove the Power Shards from the Miners for later use.
- For crossing a belt over a congested area, build Conveyor Lifts at both sides to form an elevated 'bridge'.
- You can also use Stackable Conveyor Pole.
- Alternatively, you can bring it to a lower level. This requires a lower platform to be built below.
- Bring the Steel Pipe, Steel Beam, EIB, Stator, and Automated Wiring back to the base with belts. Build Industrial Storage Containers at the base, not at the Steel production area.
- Bring the Black Powder back to the base and automate the production of Nobelisk.
Using Daniel's Calculator to plan the factory production.[3]
Using a Hyper Tube to travel vertically. Both its ends are built with Powered Hyper Tube Entrance.
The in-game setup according to the calculator. Observe the placements of Splitters and Mergers. Optional: underclock some of the machines to achieve 100% efficiency.
Use Conveyor Lifts to cross a belt over congested area.
Project Assembly - Framework
- To complete 'Project Assembly - Framework', we need more Smart Plating, Versatile Framework, and Automated Wiring.
- We dismantled the Smart Plating production earlier. Now we have to rebuild it but on a larger scale.
- We have Steel Beams readily available for Versatile Frameworks.
- We have Automated Wiring automated, and its production rate is even sufficient for the subsequent delivery: Project Assembly - Systems.
- There are four pure and three normal Iron nodes supplying the base; upgrade all of them to Miner Mk.2 and overclock all each of them to 270 / min.
- This increases the Iron Ore mining rate to 1890 / min. (
7 * 270 = 1890) - Build the factory first; Power Slugs can be collected later for the overclocking.
- This increases the Iron Ore mining rate to 1890 / min. (
- Use Daniel's Calculator[4] to generate the below diagram, and build accordingly.
- Add whatever Alternate Recipes you have unlocked into the calculator; the result might differ from below, but will definitely be more resource-efficient.
- First, revamp the Iron production. Build a large platform (45 x 30).
- Be creative. It is not necessary to build everything on the same floor like the example below; you can make it more compact by splitting and stacking the factory into multiple floors or even create 'mezzanine' floors in-between. Take note: different buildings have different hitbox heights.
- Cut down any tree that penetrates the platform.
- If the Space Elevator is in the way, relocate F it to somewhere else.
- Before the new factory is up and running, do not dismantle the old factory. It is still useful to produce the building material that we might require during the process.
- From now on, use Industrial Storage Container instead of Storage Container to store end products.
- Alternatively, multiple Storage Containers can be stacked on each other and be chained with Conveyor Lifts to act as larger storage.
- Do not expect this setup to be completed in one go. Take it slowly and separate the construction into a few days.
- When designing a compact factory layout, think about how to keep the belt length to a minimum.
- Main bus designs may look cooler, but modular layouts have shorter belt lengths, which in turn saves building material and reduces the footprint.
- 'Main bus' refers to the parallel belts that act as a material highway. 'Modular' refers to a small cluster of buildings that are functional as a module and they are easily expandable by repeating the layout.
- Examples of a modular factory:
- Screws and Iron Ingots are consumed in large amounts. To minimize belt usage, build the next factory that requires them nearby. For Iron Ingot to Iron Rod, the Smelter to Constructor ratio is 1:2. For Iron Ingot to Iron Plate, the Smelter to Constructor ratio is 1:1.
- Screws to Rotor building ratio is 2:5; that means build five Constructors in a group, then split their output into two Assemblers. For Screws to RIP, it is three Constructors: two Assemblers.
- The advised building sequence is:
- Build a small module of buildings; put down some Splitters, Mergers, and Power Poles to test the building placement. Once you are satisfied with the modular design, proceed to mass-construction.
- Build the factory buildings first; leave plenty of space between clusters.
- Set the building recipes.
- Build Splitters and Mergers and connect the belts. Construct flyover belts where necessary.
- Build Power and Power Lines.
- Check if all the Indicator Light are green and troubleshoot the faults.
- When connecting infrastructure (such as belts, pipes, and power), follow the sequence of crafting steps.
- For example, start from Miner, then Smelter, etc. That way, as you complete the current building connections, the input belt will be filled up with material from previous factories.
- Produce Versatile Framework and Motor as shown below.
- Centralize the storage area by putting them close together, with at least one Industrial Storage Container storing each kind of item. Relocate the HUB there.
- Conveyor Lifts are used to bring down the items from higher floors to the ground.
- To 'label' a storage building, build a short belt from its output, as shown in an image below.
- While waiting for the Space Elevator's material, collect more Power Slugs and craft them into Power Shards, then overclock the Miners accordingly.
Using seven Mk.3 belts of Iron Ore to produce a large number of Iron products for the Project Assembly.
Observe three Screw Constructors are grouped with two RIP Assemblers. Five Screw Constructors are grouped with two Rotor Assemblers.
Automation of Motors and Versatile Frameworks.
Use a short belt connected from the Industrial Storage Container output as a label. Assemblers at the background are producing Motors and Versatile Frameworks.
Tier 5 and Tier 6
- Congratulations, you have unlocked Tier 5 and Tier 6!
- Look at the Space Elevator to check the requirements for the next (and, currently, the final) delivery: Project Assembly - Systems.
- Our next long-term target is to collect enough Hard Drives around the world to unlock all available Alternate Recipes before further expanding our factory.
- Further reading: Alternate Recipes
- Oil processing is the key component for Tier 5 and 6. Before we unlock the alternate recipes, we will first set up a temporary, inefficient factory with a lot of wastage, but still enough for bootstrapping the Plastic and Rubber production. Later on, we will construct a more efficient Oil processing factory.
- Getting more Power Slugs is becoming more challenging as the Power Slugs around the starting area have been exhausted, forcing you to travel further. Luckily, Power Slugs are renewable, provided you have tamed at least a Lizard Doggo.
- Before moving on, build a temporary Assembler crafting A.I. Limiter using Quickwire and Copper Sheet, then underclock it to 30%.
- Research Smart Splitter in the MAM.
Taming a Lizard Doggo
- This section is optional, but it can be helpful for generating Power Slugs.
- Unlock Fence at the AWESOME Shop by sinking some Motors, Versatile Frameworks, and Automated Wiring.
- 'Sinking' refers to the act of putting items onto a belt that feeds into AWESOME Sink, either directly from factory buildings or via a Storage Container.
- Take note: items cannot be directly dispensed onto a Conveyor Belt via manual interaction. Dropped items will simply remain stationary.
- Do not sink Computers that you have looted from Crash Sites; they will be used later.
- Before taming a
 Lizard Doggo, build a Lizard Doggo pen near the HUB using Fences and Foundations.
 - Bring some Paleberry with you. Do not eat them as they are the bait for Lizard Doggos.
- Paleberries can be found around grassy biomes, such as near the Coal Power area.
- Look around until you find a Lizard Doggo. When it stares at you, stop moving.
- If you are in the running mode, press ⇧ Shift to toggle it to walking mode.
- Un-equip the Blade Runners.
- If the pioneer jumps too high or run too far from the Lizard Doggos, they will flee.
- Open Inventory. Hold down
 on the Paleberry to custom split one of it from its stack. Drag one Paleberry outside the Inventory window to drop it.
 - Wait until the Lizard Doggo comes over and eats the berry. Do not move, just look at it.
- After it eats the berry, look at it and interact E to pet it; this will tame the Lizard Doggo.
- As long as you pet the Lizard Doggo after it eats the Berry but before it leaves the spot, the taming probability is 100%.
- Interact E with Doggo again will open up its inventory window, displaying only one empty slot at the left. The pioneer's inventory is at the right.
- When the Lizard Doggo finds something, the item generated will be displayed in this single slot.
- Close its inventory window Esc. Closing with the top-right 'X' is glitchy, as it will not close the UI properly.
- Press ⇧ Shift to toggle back to running mode.
- Bring the Lizard Doggo back to the pen, and make sure it is following you.
- Low-lying Conveyor Belts and other structures can block Lizard Doggos' movement. Temporarily dismantle the obstructions where required.
- Lizard Doggos cannot jump. When traversing cliffs or ravines, walkways or ramps might be required for Lizard Doggos to cross over.
- Lure the Lizard Doggo to the floating foundation above the pen, then dismantle the floating foundation to trap it in the pen.
- The Blade Runners can now be re-equipped.
- From time to time, random items will be generated, including Power Slugs. Check them out regularly (by interacting with Lizard Doggo).
- Read Lizard Doggo for a list of generated items.
- The best item they can generate is Purple Power Slugs.
- Sometimes the Lizard Doggos might forget their owner. Re-tame them if that happens.
- There are lots of Lizard Doggos around the world; try to tame them all.
Build a pen with Fence and Foundations. When the Lizard Doggo and you stand on the floating foundation, dismantle it to trap the Doggo in the pen.
Hold down
 at Paleberry and custom split a Paleberry from its stack.
Dropping a Paleberry near a Lizard Doggo.
The UI of a Lizard Doggo, showing one empty inventory slot. It has not found any item yet.
Oil Processing
- Unlock Tier 5 - Oil Processing.
Alternative Fluid Transport
- Most Tier 5 Milestones require Plastic and Rubber, which are both refined from Crude Oil.
- Add four Oil Extractors and two Refineries to the To Do List.
- Scan V for Crude Oil. The scan results show that they are nowhere near the base; the nearest is 1.6 km away.
- We will use the Oil nodes to the southwest.
- Beyond the To Do List, prepare:
- Iron Rod, Iron Plate, Concrete, Cable: minimum three stacks each.
- Wire, Quickwire, Solid Biofuel, RIP, Rotor, Motor, Modular Frame, Steel Beam, Steel Pipe, EIB, Nobelisk: minimum one stack each
- Blade Runners, Xeno-Basher, Beryl Nuts, Nobelisk Detonator, Chainsaw, Object Scanner
- As we are extending the Power grid there, bring extra Cables and Concrete.
- There are Flying Crab Hatchers and Alpha Spitters guarding the oilpatch; approach with care.
- Save the game.
- Head to the southwest Oil patch. As the Resource Scanner search result only lasts for 25 seconds, re-scan if the Oil icon disappears from the compass.
- Build Power Lines as you move.
- The Oil nodes are located on the islands. Use Foundations or Walkways to build a path across the sea, as swimming is relatively slow.
- While swimming, make sure the Blade Runners are equipped and keep jumping on the water surface for optimum movement speed.
- Save the game once you land on the islands.
- There are four Oil nodes there; kill all the creatures guarding them. Build an Oil Extractor on top of each Oil node and Power them.
- Pick any Oil Extractor and connect it to two Refineries with pipes and a Junction, both crafting Plastic. You don't have to connect the Refineries' outputs.
- Provide Power to the Refineries as well.
- A Pipeline Junction Cross can be built at the middle of an existing Pipeline by snapping its hologram at the pipe.
A temporary setup for getting our first 200 Plastics. Dismantle the Refineries after 200 Plastics are produced. Keep the Oil Extractor.
- Build an Equipment Workshop, craft a Beacon, equip it, then
 to put it on the ground.
- Look around the Islands; if there are Spore Flowers in the way, remove them with a Nobelisk Detonator.
- Find an open space nearby, preferably on the open sea, then build a platform (size 38 x 14) at sea level.
- There are some Power Slugs nearby. Use them to overclock all Oil Extractors to 300 m3/min.
- Oil Extractors should not be overclocked beyond 300 m3/min as that is the maximum flow rate of a Pipeline.
- Optional: At the mainland East of the Oil Islands is a large cave; scout the area and scavenge the Power Slugs, Computers and other material laying around.
- Take out 200 Plastics from the Refineries and dismantle them.
- Go back to the HUB and complete Tier 5 - Alternative Fluid Transport.
- Note: Heavy Modular Frame can be manually crafted at Craft Bench or looted from various Crash Sites.
Industrial Manufacturing
- Add 28 Refineries, five Packagers four Constructors, and one AWESOME Sink to the To Do List. Bring extra Copper Sheets for constructing Pipelines.
- It will take multiple trips to bring the necessary material there. If you have the Tractor unlocked, try to use it.
- Further reading: Tractor
- By referring to the Beacon labeled 'Oil' on the compass, go back to the Oil Islands.
- Following a built Power Line is another way to trace your destination, provided you have constructed it during the previous trip.
- Build the setup as shown below.
- Building tips:
- Try to build Pipelines at about the same level as the source building's (for example, Oil Extractor) pipe outlet. This eliminates the need for Pipeline Pumps.
- Do not exceed the flow rate limit of a Pipeline, which is 300 m3/min. Split a Pipeline into multiple lines where required. A similar principle applies to belts.
- In a Constructor, when setting recipes such as Empty Canister, it can be difficult as it is positioned at the bottom of the list. Collapse the Constructor's 'Select Recipe' list by clicking the '-' at the right side of each category.
- When constructing Junctions, place one first, then hop onto it. It is easier to build Junctions when standing on a higher elevation. Build the next Junction, then hop onto it, and repeat the process. The same technique applies to Splitters and Mergers.
- Buildings such as the Refinery have multiple guidelines (the Turquoise line when you place another building nearby): Building center line, Belt connector line, Pipe connector line, etc. Be sure to distinguish them properly.
- Craft an A.I. Limiter and build a Smart Splitter at the Packaged Fuel's output belt, with an Any output connected to a local Industrial Storage Container and an Overflow output connected to an AWESOME Sink.
- Read Smart Splitter for configuration details.
- A Refinery stops working if any of its output slots are full. Sinking the excess Packaged Fuel will ensure the Heavy Oil Residue a.k.a. HOR will never have a chance to clog up the Plastic and Rubber production.
- After the building is completed, pull the Plastic and Rubber belts back to the base.
- Before returning to base, take 300 Packaged Fuel with you to use as fuel for Vehicles.
- When laying a long belt, it is advised to elevate them by extending the height of the Conveyor Poles. This will minimize potential obstructions for other tasks such as bringing a Lizard Doggo home.
- To build a tall Conveyor Pole, first click its hologram on the ground, then move up the mouse before clicking the second time.
- Near the base, build Industrial Storage Containers at the end of the Plastic and Rubber belts.
- Complete Tier 5 - Industrial Manufacturing.
Collapsing the crafting recipe menu at the Constructor's UI to minimize intensive scrolling when selecting a recipe. Click the '-' at the right side of each category.
The completed starter Oil production, looking from above on a tower of Industrial Storage Containers.
Extend up the Conveyor Poles to lay elevated belts, minimizing future obstruction. Move the mouse up before placing the Pole.
Expanded Power Infrastructure
- At least 14 meters above the Iron production, build another floating platform (22 x 15).
- This creates a 13-meter clearance which is sufficient for most of the buildings such as Constructors, Assemblers, and Manufacturers.
- Setup the bootstrap factory for Heavy Modular Frame followed by Computer as shown below.
- We need Heavy Modular Frame a.k.a. HMF to build Manufacturers. They can be looted from Crash Sites or crafted manually.
- HMF can be easily automated with materials in storage, as we have an excess of each ingredient automated.
- Once the Computer production is up, revamp the Copper and Caterium productions as shown below. This is for preparing for the Supercomputer production in the coming section.
- We have 270 excess Screws/min from the Iron production. Split them to feed both the HMF and Computer production lines.
- The recipe for crafting High-Speed Connector can be researched at the MAM.
- Underclock the Manufacturers as shown to prevent them from consuming all the upstream material (Screws, Cables, etc).
- Dismantle the old Copper and Caterium production lines after completing this setup. Their Containers are probably full; do not dismantle those Containers.
- Observe the Copper Ore and Copper Ingot item flow rate is more than 270/min; this exceeds the Mk.3 belt's capacity. We will solve the problem by upgrading those belts to Mk.4 later.
- Use a Smart Splitter to prioritize supplying the Computer and HSC Manufacturers by hooking up the Circuit Board storage to an Overflow output.
Producing Heavy Modular Frames with a Manufacturer underclocked to 75%.
Producing Computers with a Manufacturer underclocked to 80%, along with improved Copper production.
- Complete Tier 6 - Expanded Power Infrastructure.
- Replace the hotkey four with Conveyor Belt Mk.4. From now on, build with Mk.4 belts, as they have much higher capacity. The same applies to Conveyor Lift Mk.4.
- Replace the Copper ore and Copper ingot belts with Mk.4 to increase the allowed item rate from 270/min to 480/min.
Jetpack
- Complete Tier 6 - Jetpack.
- Craft a Jetpack and try using it to fly around. Make sure you have Packaged Fuel in inventory. Useful for collecting Power Slugs and exploring Crash Sites.
- Sink extra Computer and HMF to unlock more Walls / Foundations / special vehicles at the AWESOME Shop. Do not buy any Statues yet.
- For a list of items and their Sink Points, read here.
Manufacturing 1
- Unlock Supercomputer, Fabric, Rifle, and Cartridge at the MAM.
- Craft a Rifle for future use.
- Automate the following items with Manufacturers:
- Adaptive Control Unit, Modular Engine, Supercomputer, Beacon, Rifle Cartridge, in mentioned order.
- For Rifle Cartridge production, use a separate Copper Ore belt (the 2nd Copper Node that you have tapped from the West).
- We only ever need 100 Adaptive Control Units (ACU) - or two stacks of it. To prevent overproduction, and thus consuming the Computers and HMFs, fill all slots in its output Storage Container except one with other items such as Concrete. Split
 a stack of Concrete to fill up many slots, as shown below.
 - Tips to build a compact Manufacturer Manifold:
- Build Manufacturers in a row, then stack several Splitters in a ladder-pattern, one Foundation away from the Manufacturer. Splitters should face the same direction, either all-left or all-right.
- Dismantle unused Splitters. Connect them with horizontal belts.
- Connect the Splitters and the Manufacturer with belts and Conveyor Lifts.
- Check if all ingredients are flowing into each Manufacturer.
- Alternatively, we can build all these in 2D - place all Splitters on the same level, similar to what we did for Assemblers.
- Do not be afraid to build spaghetti as this setup is temporary.
- Connect a belt between the Versatile Framework and the Space Elevator.
- You don't have to belt the Modular Engine and Adaptive Control Unit, as they are only required in small quantities.
Automation of various products at a small scale. Underclock where necessary.
Limiting a Storage Container's inventory by manually filling it with other items.
Build Manufacturers in a row.
Stack Splitters behind Manufacturers in a ladder-shaped pattern. The outer edge of the Splitter is eight meters away from the edge of the Manufacturer.
Connect Splitters and Manufacturers with belts and Conveyor Lifts.
Monorail Train Technology
- Complete Tier 6 - Monorail Train Technology.
- Trains are effective for transporting large amounts of items over long distances.
- In this section, we will first learn to exploit this property: Trains can clip through terrain and can carry pioneers. This allows us to clip through the mountain wall, cutting a straight-line path to the Quartz nodes in the cave. Our goal is to reduce the travel distance and belt length to a minimum. We will then bring the Raw Quartz back to the base using the shortcut path.
- Aside from trains and Railways, belts, pipes, and Hyper Tubes all can clip through the terrain.
- From the base, scan for Raw Quartz, then move to the slope in-between the two Quartz, as shown in the image below.
- Build Foundations in a diagonal zigzag shape as shown for the Railways to build on.
- Build two straight segments of Railways at 90 degrees, then connect them both with another curved Railway. Make sure the curved Railway is clipped through the ground.
- Build a Train Station at one end of the Railway and Power it.
- Build an Electric Locomotive on the Railway, facing West.
- Bring some material for the construction of Hyper Tubes, Hyper Tube Entrances, Power Poles, and Foundations. Equip a Jetpack.
- Save the game, then enter the Locomotive.
- Drive the train into the slope. Once you are inside, exit the train E. Pioneers will always depart a train from the right-hand side.
- Be careful not to fall off the Railway. Build a Foundation / Double Ramp bridge connecting the slope and the cave as shown below.
- Use the Jetpack to move around. When constructing the ramp, be careful not to exit the ground surface.
- Build two belts and a Hyper Tube with Entrances at both sides and connect Power Lines as shown.
- Split the Hyper Tube into two at the middle of the Ramp and leave some space in between; this allows us to return to the ramp in the future.
- The other two ends are to be placed outside the ground, one at the base and the other in the cave.
- We can now clip into the ground with the Hyper Tube.
- Dismantle the Locomotive, the Railway, and the Train Station.
- Deliver two belts of Raw Quartz from the cave back to the base.
- Return to the cave, collect at least 2000 Mycelia by using Chainsaw, then store them in an Industrial Storage Container.
- Collect all the Power Slugs in the cave with the Jetpack, then overclock both Quartz Miners to 480/min (or 300/min for a normal node).
Build a Foundation / Double Ramp connecting the base and the cave. Build belts to transport Raw Quartz. Build Hyper Tube, split it at the middle for future access into the ground.
Two belts of Raw Quartz, straight from the cave.
- Other than using the above method, building Conveyor Lifts to clip through the ceiling of the cave will also work.
GasMask
- Automate Biomass production by using Constructors, each crafting a different raw item into Biomass: Leaves, Wood, Alien Carapace, Alien Organs.
- Reserve some Alien Carapace and Alien Organs for MAM Research and for crafting Medicinal Inhaler.
- Build an Assembler to craft Fabric, then store it in an Industrial Storage Container.
- While waiting for the Fabric to pile up, automate the production of Crystal Oscillator with two Manufacturers.
- Learn how to use an online calculator to figure out its production ratio.
- Use the 2nd Copper belt for Crystal Oscillator production.
- Once you have obtained enough Fabric, complete Tier 5 - GasMask.
- If there is excess Fabric, research Parachute.
- Automate the production of Filters with a Manufacturer.
- Unlock all possible research in MAM.
- Equip the Gas mask and bring some Gas Filters; use them to collect a few Power Slugs in the surrounding Poison Gas.
- More Power Slugs can be found in caves or Poison Gas around the base. Make use of the Object Scanner.
- Recall which Miners you have yet to overclock, then overclock them accordingly.
Explorer
- At the MAM, research Explorer.
- Build an Explorer on the ground and fuel it with Packaged Fuel or Solid Biofuel.
- Test drive the Explorer. Avoid driving it into deep water. Shallow water is fine.
- If you get stuck, get out of the vehicle and dismantle F it.
Hard Drive hunting
- This section may require from a few hours to a few days to complete. Take your time.
- At the MAM, research Radio Signal Scanning, Object Scanner Improvements and Hostile Organism Detection.
- Radio Signal Scanning allows the Object Scanner to scan for Crash Sites within a 300-meter radius.
- Hostile Organism Detection allows the Object Scanner to scan for nearby enemies.
- Use the Explorer to drive to the Oil Islands and bring back 20 stacks of Packaged Fuel. Keep only three stacks of them in Inventory and store the remaining at the base.
- Find an Online Map such as 'Satisfactory Interactive Map', and enable the layer for Hard Drive.
- Use the online map to plan your journey. There are many Hard Drives available for collection; separate the collection of those into three or four trips.
- Observe each of the Crash Site requirements and prepare the necessary items. For example, Rotors, Black Powders, etc. Some require Power which can be fulfilled by using Biomass Burners.
- Some of Crash Sites require Superposition Oscillators and Quantum Computers. As they are currently not available in-game, ignore them.
- Ignore Crash Sites involving Tier 7 items such as Turbo Motor and Radio Control Unit. Revisit them after you get into Tier 7.
- Be sure to loot the Heat Sinks around the Crash Sites; they can be used to unlock certain Hard Drives.
- Use the online map in conjunction with the in-game map to orientate yourself with the Crash Sites' position. The Object Scanner can also be used to lead you to the Crash Sites.
- Take note of their elevation (z = number in centimeters) in the online map. It indicates whether a Crash Site is located on high ground.
- Before exploration, prepare the following in inventory:
- Rifle Cartridge: min. seven stacks
- Iron Rod, Iron Plate, Concrete, EIB, Packaged Fuel: three stacks each.
- Wire, Cable, Quickwire, Solid Biofuel, RIP, Rotor, Stator, Motor, Modular Frame, Steel Beam, Steel Pipe, Nobelisk, Gas Filter, HMF, Circuit Board, Computer, A.I. Limiter, HSC, Supercomputer, Black Powder, Quartz Crystal, Crystal Oscillator, Rubber - min. one stack each
- Xeno-Basher, Beryl Nut, Paleberry, Chainsaw, Nobelisk Detonator, Object Scanner, Rifle, Blade Runners, Jetpack, Gas Mask.
Bring these with you when going to Crash Sites for collecting Hard Drives. We have automated most of these items.
- In the options, change the auto-save interval to three minutes. There is a high chance to die during the Hard Drive hunting.
- As you retrieve a Hard Drive, build a MAM immediately and then research it. Once you click 'research', dismantle the MAM and move on to the next Hard Drive.
- Once the 10-minute countdown timer ends, rebuild the MAM and pick one of the options given:
- Prioritize the following whenever possible: Inventory expansions, Compacted Coal, Turbofuel (not Turbo Heavy Fuel), Heavy Oil Residue, Diluted Packaged Fuel, Recycled Plastic, Recycled Rubber.
- If none of the above is available, then just pick any. Eventually, we will unlock all of the alternate recipes, so the order of unlocking recipes is not really important.
- Further reading: Hard Drive#Alternate recipe analysis
- Collect Power Slugs as you move. Craft them all into Power Shards to save on inventory space.
- Aim to get at least 100 Power Shards each trip.
- Delete unnecessary items regularly such as Leaves, Wood, ores, etc. to save inventory space.
- If Radiation damage is received, immediately back off and avoid the area. We will need Tier 7 equipment - Hazmat Suit to protect ourselves from Radiation.
- Whether to equip Blade Runners, Jetpack, or Gas Mask depends on the situation as you can only choose one of them.
- When you spot a Lizard Doggo, mark the location with a Beacon and come back later to tame it. Avoid taming Lizard Doggos and hunting Hard Drives at the same time.
- If you run out of ammo or Packaged Fuel, return to the base for restocking, then plan for the next trip.
- Repeat until all possible Hard Drives are collected (min. 72 required).
- By the time you have completed the Hard Drive hunting, you should have unlocked about 20 to 40 Alternate Recipes. (There is a total of 70 Alternate Recipes).
- Two of the Hard Drives' results will not unlock Alternate Recipes; they will be used to expand the Inventory size instead.
Concrete 2
- After the Hard Drive hunting, we can now resume the base building operation.
- Organize the inventory; keep only what is needed and store the excess in the Personal Storage Box.
- Build additional Storage Boxes near the HUB for convenience.
- Keep track of the 10-minute timer; research the next Hard Drive once the previous is concluded. Repeat until you unlock all the Alternate Recipes.
- Overclock both Limestone Miners nearby the base to 480 / min (or 300 / min for normal node) and scale up the Concrete production.
- It is advised to use the original Concrete recipe (Limestone -> Concrete) instead of Wet Concrete, as the Limestone nodes are abundant.
Fuel Power
- Chances are all four of these Alternate Recipes have yet to be unlocked: Compacted Coal, Turbofuel, Heavy Oil Residue, Diluted Packaged Fuel. Be sure to choose them when available.
- While waiting for the Hard Drive research, build temporary Fuel Power to prepare for Turbofuel Power.
- For fast travelling, build a Hyper Tube Cannon at the base, aimed at the Oil Islands. Chain 15 Hyper Tube Entrances together.
- Read Hyper Tube Cannon to learn how to construct it.
- If there is a rock or boulder blocking the construction, we can use a Nobelisk Detonator to remove it.
- Build another Hyper Tube Cannon at the Oil Islands, aimed at the base, for efficient 2-way Hyper Tube transport. As each Entrance consumes a flat 10 MW, this setup consumes 300 MW.
If a rock is in the way, detonate it with a Nobelisk Detonator.
A Hyper Tube Cannon built at the Oil Islands, aimed at the base. Use the compass / Space Elevator to identify the direction of the base.
Flying from the Rocky Desert to the Oil Islands across 1.6 km in 16 seconds (360 km/h).
- Build 13 Fuel Generators, tapped from the Fuel production Refineries. Divert the Pipes and Junctions such that all the Fuel from the Refineries are supplied to the Fuel Generators first.
- At the end of the Fuel Generator line, stack five Stackable Pipeline Supports and connect the Pipe through the topmost support. This introduces a head lift of 10 meters.
- Connect the other end back to the Packaged Fuel Refineries.
- This creates a Pipeline 'overflow' effect based on the combination of the following principles:
- Pipes nearer to the fluid source (such as Extractors, Refineries) have a higher priority to be filled up first, so as the connected buildings.
- Pipes at lower elevation will be filled up first. Higher Pipes will be filled up last.
- Pipes partly, or entirely beyond the head lift can never be fully filled up.
- Power capacity increases as the Fuel Generators are added to the Power Grid. However, it is not consistent, since our fuel production is not consistent - it is tied to the production of Plastic and Rubber.
- We can solve this by sinking all the excess Plastic and Rubber such that it will not clog the production of Fuel.
- Insert a Smart Splitter onto each Plastic and Rubber belt, then set the side output to 'Overflow'. The same applies to the Plastic belt before the Empty Canister Refineries.
- Further reading: Smart Splitter
- Connect all the overflow belts to an AWESOME Sink.
- Replace the earlier overflow setup for Packaged Fuel with a Smart Splitter too.
- After a while, check the Fuel Pipe between the Refinery and the Fuel Generators; its flow rate should be maintained around 200 m3/min.
- The Power capacity is now stabilized.
Using a Smart Splitter with Overflow Setting on the Right output to overflow all the excess items to the AWESOME Sink.
Interact with the Smart Splitter and adjust the overflow settings. An example is shown for Packaged Fuel.
Sinking the overflowing Packaged Fuels to prevent the clogging of Plastic and Rubber production.
Using head lift and distancing to prioritize the Fuel Generators over Packaged Fuel for Fuel consumption.
Stacking five Stackable Pipeline Supports to introduce a head lift of 10 meters high to restrict the fluid flow. Only when the pipe before it is full, the fluid can pass through it.
A completed setup for temporary Fuel Power, providing additional 1950 MW to the Power grid.
- Overflow the excess Empty Canisters to an Industrial Storage Container with a Smart Splitter; we will use these for Turbofuel Power later.
- Return to the base and check the AWESOME Sink and the AWESOME Shop; purchase more buildings/blueprints whenever possible.
- Unlock Factory Cart and Cyber Wagon.
Project Assembly - Systems
- Complete Project Assembly - Systems. We have sufficient resources to complete it by now.
- Congratulations! Tier 7 is now unlocked.
- Tier 8 and above is currently unavailable in Early Access. As such you may safely dismantle the Space Elevator or keep it as a visual beacon.
- Increase the number of Industrial Storage Containers for Motor, EIB, Copper Sheet, and Steel Pipe to two for each of them, as we will use large quantities of them for the upcoming sections. We need sufficient buffers for that.
Geothermal Power
- This section is optional.
- Research Power Pole Mk.3, Geothermal Generator and Programmable Splitter in MAM.
- Check the MAM; all research should be completed except Radio Control Unit, which requires Tier 7 items.
- Scan V for Geysers. Some of them are near the Steel production.
- Build two Geothermal Generators there and connect them to the Power Grid.
- Further Reading: Geothermal Generator
- There are more geysers scattered around the World; if you happen to see one of those, be sure to exploit it.
Geothermal Generators built on top of Geysers at the Rocky Desert.
Radar Tower
- This section is optional as we have revealed the majority of the Map area during the hunt for Hard Drives.
- At the MAM, research Radar Technology.
- A Radar Tower consumes Power and reveals part of the Map.
- It can only scan for the area below its antenna. Areas above it will remain unrevealed even after the scanning process.
- Further reading: Radar Tower
- Build a Radar Tower on a nearby high ground/rock pillar / floating platform and observe how it works.
- After it reaches its maximum scannable area, dismantle it to save Power.
A Radar Tower built on the highest rock spire at Rocky Desert, situated 488 meters above sea level.
Circular areas revealed by Radar Towers: one on the Rock Spire, the other at Oil Islands at sea level. Observe their coverage differences.
Tier 7
- Our next target is to automate the production of Turbo Motors so we can double existing production with Miner Mk.3.
- In Tier 7 there are Aluminum and Uranium production chains that we can dive into. But first, let's improve the Power capacity: the worst thing that can happen in a mega factory is a power trip.
- As there is no next phase for Project Assembly, dismantle the production for Project Assembly parts: Smart Plating, Versatile Framework, Automated Wiring, Modular Engine, and Adaptive Control Unit.
Turbofuel Power
- Turbofuel Power is an upgrade from the Fuel Power. It requires four components: Water, Crude Oil, Coal, and Sulfur.
- Use an Online Map and search for a location with all of these located nearby: such as the Lake Forest as shown below.
- Use an Online Calculator and select a combination of the most efficient Alternate Recipes for crafting Turbofuel. Its production will be bottlenecked by the amount of Sulfur, as there are only two normal Sulfur nodes around for 600 Sulfur/min. This in turn limits the Turbofuel production to 750 m3/min.
- The maximum amount of fluid involved is in between 600 m3/min and 900 m3/min. By separating the setup into three smaller, repeatable modules, the fluid flow within each module will be under 300 m3/min.
- Turbofuel burns at a rate of 4.5 m3/min for each Fuel Generator.
750 / 4.5 = 166.67; round it up to the nearest multiple of 3, which is 168. We will then build 168 Fuel Generators. - We need 42 Refineries for Turbofuel - as we round up to the nearest multiple of 3.
- Build a floating platform (57 x 48). You may use other designs according to your own creativity/preference.
- Build Hyper Tube Cannons for fast transport between the base and the Turbofuel Power outpost. We will need to travel frequently between these two areas.
- Tap all of the three nearby Oil nodes and overclock each of them to 300 m3/min. We only use two of them as the Crude Oil required is only 337.5 / min.
- Tap all of the nearby Coal and Sulfur nodes and overclock each to 480/min (or 300/min for normal node).
- Build floating Foundation bridges or Ramps to access and transport the required resources.
- There will be three identical modules to be built. Focus on one module at a time. After a module is built and is up and running, repeat the design another two times to complete the full setup.
- A module consists of: three Water Extractors, eight Assemblers, 33 Refineries, and 56 Fuel Generators. The platform size for a module is 57 x 16.
- The belt and Crude Oil inputs will be shared among modules.
- As the platform is located at a high elevation that exceeds the 10-meter head lift of an Oil Extractor, a series of Pipeline Pumps are required to pump up the Crude Oil.
- Temporarily open a hole in the platform by removing a Foundation nearby a Junction, then build a stack of Walls downwards for the Pipeline Pump to be snapped on. Build one piece of the wall above the platform, then build the walls all the way down to the ground level where the Oil Extractors are located.
- Delete the topmost wall that is above the platform.
- Use a Color Gun loaded with some Color Cartridges, paint it
 with any color other than the first color theme.
  to switch the color theme. In this example, the red color is chosen.
- From the ground and counting up, paint the 2nd wall. Then skip four walls and paint the 5th (the 7th wall from the ground). Repeat all the way up. If the highest wall is colored, paint the 2nd highest instead.
- On the side of each colored wall, build a Pipeline Pump and make sure its arrow is pointed up. Place it in the same relative position of the wall for each colored wall.
- Build a tall structure such as a Radar Tower or use a Jetpack to climb to a higher elevation. It is easier to build these Pipeline Pumps while standing on a higher elevation.
- Connect the Pipelines and Power the Pumps using Wall Outlet Mk.2, which is unlockable at the AWESOME Shop.
- To cover the hole in the platform, rebuild the Foundation and then join the last segment of the Pipeline between the topmost Pump and the Junction. Make sure the Pipeline Pump is not blocking the Foundation.
- You may need to temporarily remove some adjacent Foundations during this process.
- Check if the upper Pipes are receiving Crude Oil. If not, check the placement of the Pumps, the connectivity of the Pipe, and whether all the Pumps are Powered.
- Merge the Water output from three Water Extractors into one Pipe, then bring the Water up using the same method.
- Do not worry too much about the Water Extractors' placement; there is plenty of space in the lake and we only need to build 11 of them.
- Optional: For the aesthetic and color-coding purpose, paint the Crude Oil pipes in black and the Water pipes in blue. Have fun with the colors!
- Prime the setup by manually putting 15 stacks of Empty Canisters into five Packaged Water Refineries. As
15 / 5 = 3, we need to separate this action into three occurrences.- Use the Hyper Tube Cannon. Instead of flying back to the base, use the directional keys to divert the flight path to the Oil Islands. Take the Canisters and fly back to the Turbofuel outpost using the same method.
- The Empty Canisters involved in the setup are fully reusable; this means neither input nor overflow is required. Form a closed loop with Splitters, Mergers, and a Storage Container as the buffer.
- The buffer can be located either at the Empty Canister belt or the Packaged Water belt–both work.
- The Heavy Oil Residue Refineries will produce Polymer Resin as a byproduct. Refine it into Polyester Fabric and store it in a Container. Sink the overflow Resin.
With 600 Sulfur / min available, the Turbofuel production is limited to 750 m3/min. Take note this is schematic is a scaled-down version of 750/min down to 667/min.
Remove a Foundation for the Pipes to come up, and build Walls downwards for Pipeline Pumps to be snapped on.
Place Pipeline Pumps on the painted Walls. This spaces the Pumps 20 meters vertically apart.
Converting Polymer Resin into Polyester Fabric with Refineries. Sink the overflow Resin.
The completed Turbofuel Power outpost, generating 25 GW. This Map is generated by uploading the save files to Satisfactory Interactive Map[5].
- The entire setup should add 25000 MW (or 25 GW) to the Power capacity.
- Allow some time for Power capacity to be stabilized; it takes time for Turbofuel to fill up the Pipe network.
750 / 4.5 x 150 = 25000 MW, where 750 is Turbofuel produced per min, 4.5 is the consumption rate, and 150 is the Power capacity of each Fuel Generator.
- Optional: disconnect the Coal belts supplying the Coal Power to free up the four Coal nodes.
- Dismantle the Fabric Assembler at the base, which is using Biomass and Mycelia. We are now producing the Fabric with Polymer Resin instead.
- As Fabric is consumed only in small amounts, you may choose to belt it to the base from the Turbofuel outpost or by manually carrying it back once in a while.
Bauxite Refinement
- Complete Tier 7 - Bauxite Refinement.
- There are new Alternate Recipes that can be unlocked via Hard Drives. Pick Electrode Aluminum Scrap when completing its research.
- Scan the Hard Drive again for Pure Aluminum Ingot; however, that recipe will not be used in this guide.
- Scan for Bauxite. The nearest three patches are all located on the rocky cliffs near the Red Jungle.
- Bauxite, Water, Coal, Raw Quartz, Copper Ore, and Limestone are required to produce Alclad Aluminum Sheet efficiently.
- You may skip Raw Quartz and Limestone by sacrificing some of the resource efficiency, exchanging Coal with Petroleum Coke.
- Use the online map to search for a suitable location for setting up the Aluminum production. As water is difficult to transport, build the production area near a large water body, preferably on the sea.
- Use Trains for long-range transport (> 800m) from now on.
- Trains are effective for distances of more than 800 meters. For shorter distances, it is advised to use belts instead, as Trains take time to accelerate and brake and thus have their throughput reduced at shorter distances.
- Use an Online Map and plan the logistical layout:
- Pick which Resource Nodes you are going to use and claim all the necessary nodes by removing the hostile creatures and placing a Powered Miner on them.
- Plan the location of Train Stations and the belt layout between the Miners and the Freight Platforms.
- Build Foundation or Ramp bridges for the Railway. Avoid using Double Ramp 8m x 8m or Ramp 8m x 4m as they are too steep for the Railways and Trains.
- A Railway has a minimum turning radius of 17 meters.
- Laying Railways on the natural terrain can be challenging.
- Plan where to build the Water Extractors and how to Pipe them to the production area. Minimize the head lift and distance when dealing with fluid transport.
- Always build a Hyper Tube Cannon for every outpost.
- Railways conduct Power between Train Stations–make use of it when expanding the Power Grid.
- Build the first Station near the sea and Power it. Build the 2nd Station near the center of the three Bauxite nodes. This station receives Power from the first via the Railway. Build the 3rd Station near the 2nd, as a transfer Station for the Quartz. Connect the Power to the 3rd station from the 2nd via Power Poles. Build the 4th Station near the Quartz nodes, then transfer the Power to the Quartz Miner via the 4th station. Refer to the image below.
- Both Quartz nodes are located in the cave on the lower ground.
- The rocky area in the Red Jungle is contaminated with Radiation. Bring plenty of Nuts for healing and be cautious against surrounding creatures.
- There are plenty of Power Slugs around–be sure to pick them up.
- You might encounter some invisible plants around the Red Jungle which are blocking construction. Cut them down with Chainsaw or with a Nobelisk Detonator.
- For the ratio of Electric Locomotive and Freight Car vs the resources transported, take note of the belt throughput and resource item stack size. We need the Train's round trip time to be less than the maximum allowed period.
- Read here for more information.
- From the table, pick 'a Mk.5 belt for each Freight Car', and ores have a stack size of 100. Thus we need to aim for a round trip time of less than four minutes and six seconds, including loading/unloading time.
- Give each Station a name as an identifier.
- At each unloading Freight Platform, set them to 'unload' the cargo. Freight Platforms are set to load by default.
- Interact E with a Train Station or the Electric Locomotive V, give the Train a name, and set the timetable as per the below image, then set it to 'Auto' mode.
- Test the train by parking the train before the loading Station, then inserting a random item into the Freight Platform and let the train run automatically. Use a stopwatch to measure its round trip time.
- You may wait at the Station or ride the Locomotive. Do not stand on a Freight Car as it is dangerous.
- If the time taken is within 00:04:06, consider removing some of the Locomotives to save Power, provided there is at least one remaining Locomotive pulling the train. If the time is longer than 00:04:06, attach more Locomotives to increase the pulling force.
- If it is still not achievable within the time period, consider increasing the setup to two Freight Cars per resource belt and the number of Locomotives. The Train Station needs to be modified to accommodate the increased Train length.
- Beside each Freight Platform, build an Industrial Storage Container and connect them with two belts, depending on whether it is set to load or unload. Between the Container and the factory / Miners, connect with only one belt. The Industrial Storage Container is necessary because belts connecting to the Freight Platform are paused for 25 seconds during loading and unloading of a Freight Car.
- Due to the Train bug, sometimes the build menu will be disabled after exiting a train. To re-enable the build menu, try entering and exiting a Hyper Tube or by saving-loading the game.
Train Stations connected by Railways on Foundations and Ramps, with a Train transiting on it.
The footprint of a Railway's end-of-line loop. This loop is only required for 1-way Trains. Use Foundations as guides; separate the loop into several smaller curved segments.
Interact with a Train Station and name it for easier identification.
In the Train Station's UI, switch to the timetable tab and set the Train schedule.
Freight Platforms are set to load by default. Toggle the button to set it to unload.
An Industrial Storage Container with two belts connected to a Freight Platform is necessary to maintain the full throughput of a Freight Car.
The schematic showing the train setup.
The Railway layout (magenta), viewed with Satisfactory Interactive Map.
- Have all the resources ready at the Aluminum production area, then proceed to the next section.
- Bauxite: Three belts (two pure + one normal), Coal: two belts (one pure + one normal), Quartz: two belts (pure), Copper Ore: one belt (normal).
Advanced Aluminum Production
- Setup the Aluminum production as shown below.
- Two products are being reused: Water and Silica.
- The Water gets partially recycled in the process, thus a lower amount of 'fresh' Water from Water Extractors is required.
- 'Fresh' refers to the Water that is not produced as a byproduct. 'Recycled' and 'Fresh' Water are both the same resources.
- Silica is produced as a by-product which is then re-used in the next refining step, thus we require less 'fresh' Silica from the Raw Quartz.
- Backlogged by-products can clog Refineries and stop their production.
- To handle Water:
- 96 m3/min of recycled Water is sufficient for 0.96 * Refinery producing Alumina Solution. Pipe the water to a single, dedicated Refinery, underclocked to 96 %. This Refinery should not be connected to the 'fresh' Water pipes (that is, from Water Extractors).
- The clock speed of the remaining three Refineries should add up to 264%. Underclock one of them to 64%. Otherwise, they may consume too much Bauxite and cause the first Refinery handling the recycled Water to starve. (
360 - 96 = 264) - Optional: underclock the Water Extractors and Refineries crafting Electrode Aluminum Scraps. They will still work even if not underclocked.
- To handle Silica:
- A simple but inefficient way is to Sink the Silica by-products.
- Avoid wastage by merging the recycled Silica with the fresh Silica belt after the Silica Constructors but before the Foundries.
- Mergers always attempt to merge input belts equally regardless if the belts are saturated. The recycled Silica, being the lesser amount compared to the fresh, tends to be used up first, so there is no chance of clogging.
- If you merge the recycled Silica belt before the Silica Constructors, it will clog.
- Refer to the image below for byproduct handling. Observe the belts' and pipes' routing.
- Test the setup by sinking all the Alclad Aluminum Sheets and check if any machine is not running properly. You can remove the AWESOME Sink once you are satisfied with the setup.
- Transport the Alclad Aluminum Sheet back to base via a Train.
- Optional: Lay the Railway on the natural terrain.
- Complete Tier 7 - Advanced Aluminum Production.
80 Alclad Aluminum Sheets/min production setup. Observe how Silica and Water byproducts are handled.
Radio Control Unit
- Radio Control Unit is one of the ingredients in Turbo Motor.
- Research Radio Control Unit at the MAM.
- Research Hard Drives for Alternate Recipes: Radio Control System, Heat Exchanger, and Turbo Rigour Motor.
- Setup the Radio Control Unit a.k.a RCU production as below.
- Do not be afraid to build spaghetti. These are all temporary.
- Whenever we 'tap' an existing ingredient resource without a dedicated production line, make sure not to exceed its current production rate.
- For example, tapping Supercomputers from their Container for RCU production. As the Supercomputer production rate is 0.5 / min, we must not exceed it or else the Supercomputers in the Container will be exhausted.
- Make sure the RCU Manufacturer is underclocked appropriately; refer to the diagram below.
- Update the hotkey and use Conveyor Belt Mk.5 and Conveyor Lift Mk.5 from now on.
Producing a small amount of RCU for the upcoming Turbo Motor production.
Hazmat Suit
- Complete Tier 7 - Hazmat Suit.
- Automate the production of Iodine Infused Filters with a Manufacturer.
- Make sure the upstream Gas Filter production is running.
- Craft a Hazmat Suit. Equip it and bring a stack of Iodine Infused Filters, go back to the radioactive area at the Bauxite loading Station, and mine out all the Uranium deposits (the green-glowing rocks). They are the source of the radiation.
Turbo Motors - With AWESOME Shop
- Build a bootstrap Turbo Motor production as shown below.
- Once the factory is running, go to AWESOME Shop and buy Turbo Motors.
- We have about 50 Miners so far. As each Miner Mk.3 requires five Turbo Motors to build, purchase at least 250 Turbo Motors.
- After the purchase is made, the bought items are stored under the 'Purchases' tab. Ctrl+
 to transfer them to the pioneer's inventory.
 - We should have generated a plenty of Coupons from the overflowing Packaged Fuel, Plastic, Rubber, and Polymer Resin.
- Alternatively, we can wait for the Turbo Motors to be produced in the Manufacturer.
A bootstrap Turbo Motor production, producing the required key material for Miner Mk.3.
Some Turbo Motors purchased from the AWESOME Shop using the FICSIT Coupons.
- Replace all the Miners Mk.2 with Mk.3. This will double up the production of every Resource Node we have tapped so far.
- It is advised to start the Miner upgrade from the Aluminum production chain, as we have to increase the Turbo Motor production later.
- From now on, all new Miners will be built with Miner Mk.3.
- Always overclock pure Miners to 163% as to match the Mk.5 belt speed. Beyond that is just a waste of Power and Power Shards.
- For normal and impure Miners, they are capped at 600/min and 300/min respectively at 250% clock speed.
- Complete Tier 7 - Nuclear Power.
- Research all remaining Alternate Recipes. There are three more to go, all related to the Uranium Chain.
Aluminum 2
- As the highest tier of Miner and Conveyor Belt are now available, we are ready to start full-scale Aluminum production.
- Upgrade all the Miners and belts. Color code the Freight Platforms to identify whether they are transporting 780/min or 600/min. (300/min for impure)
- Any other method of identification is fine, as long as you can distinguish between belts of different item rates.
- In the image below, 780/min is painted green, while 600/min is painted cyan.
- Until the new production is running, do not dismantle the existing Aluminum production.
- Use an Online Calculator and input the numbers for desired Alclad Aluminum Sheets per minute. Do not exceed the mining rate of Bauxite which is 2160 / min. (
780 + 780 + 600 = 2160) - Optional: Use Cheap Silica to minimize the Quartz consumption.
- Optional: Use Pure Copper Ingot in a Refinery to minimize the Copper Ore consumption.
- Expand the platform. Be careful not to go too near to the edge of the World, as the pioneer will start to receive 'out of bound' damage. Also, some areas of the sea are not swimmable.
- Water Extractors cannot be built on some areas of the sea, especially when located far away from the shoreline. Further reading: Water Extractor#Water depth
- In the schematic, observe that some of the items' flow rates have exceeded the Mk.5 belt capacity (divide the item rate by 780):
- Aluminum Scrap: Six belts
- Silica: Four belts
- Bauxite: Three belts
- Limestone, Coal, and Aluminum Ingot: Two belts each
- Split the setup into six smaller modules, such that each module will not contain items with rates of more than 780/min.
- By using the calculator, we can deduce that 120 Alclad Aluminum Sheet/min is a nice number for a single module.
- The modules can be tiled in a 3 x 2 array. The resources using two belts will be fed from the longer side such that each belt serves three modules, while the resources using three belts will be fed from the shorter side.
- The last module will be smaller with the leftovers, as
685 - (5 × 120) = 85or685 % 120 = 85. - Use the calculator and down-size the last module based on 85/min. This means some machines will have to be removed compared with the 120/min module.
- Copper Ore and Raw Quartz are within one belt, so a single belt of each is sufficient to supply all six modules.
- Below is an example layout of a module producing 120 Alclads/min.
- From the module schematic, observe that there are some buildings with a production of less than 0.5; this means these buildings can be shared with an adjacent, mirrored module. If it is less than 0.25, it can be shared among the four modules.
- When tiling the modules, observe all the tile-able elements and make use of mirroring/flipping to reduce the number of buildings required.
- Once a module works, proceed to build the remaining modules.
- To handle the 'leftover' material from a belt, use the Overflow Splitter–that is, Smart Splitter with the overflow settings. Use this to merge the leftovers from the 780 Bauxite belts to the 600 Bauxite belt.
- As always, check the setup and make sure everything is running properly.
- We will not be using the full 685 Alclad Aluminum Sheet/min at the moment, so there are two approaches:
- On some occasions the automated Trains might stop working for no reason. From time to time, use the Map to check if all trains are working properly.
Color coding the Freight Platforms according to their item rate. Green: 780/min, Cyan: 600/min.
Full-scale Aluminum production, sufficient for a variety of applications.
Transferring the overflow from more saturated belts to less saturated belts.
The view of the completed Aluminum production at 685 Alclad Aluminum Sheet/min.
The plan for the above setup, generated by uploading the save file to an Online Map.
Nuclear Fuel Rod
- We will have a few mega projects in the following sections, hence the 25 GW of Turbofuel Power may be insufficient.
- Nuclear Power produces large amounts of Power from a relatively small amount of resources; however the refining process for Nuclear Fuel Rods (NFR) is complex and it consumes a lot of power.
- The production of Nuclear Fuel Rods requires nine Raw Ingredients: Water, Iron Ore, Copper Ore, Limestone, Coal, Caterium Ore, Raw Quartz, Sulfur, and Uranium.
- Using the Online Map, there is a location with all these packed close together, that is, right at our old Coal Power location. Uranium is the only resource that is far away, but we can bring it in with a Train.
- As Nuclear Power Plants require lots of water to run, we will build the setup at the North sea as shown below.
- Use an Online Calculator to calculate the schematic for 10 Nuclear Fuel Rods/min and utilize some of the Alternate Recipes.
- 10 Nuclear Fuel Rods/min is chosen such that the item rate of each raw resource is less than one belt (780/min), which simplifies the setup.
- These Rods can be fed into 50 Nuclear Power Plants which will produce 125 GW in total (125000 MW).
- This setup can be expanded in the future, as there are plenty of resources around.
- The only resource that is still in use by another production chain is Sulfur. Just use a Splitter to split its belt to the Nuclear Power.
- Observe the NFR schematic is complex and difficult to read. We can simplify it by splitting its schematic so that each part only calculates a few ingredients. Customize the calculator and enable or disable certain recipes.
- The tricky part is the handling of recycled Sulfuric Acid. We will use the same technique for Water-recycling that we learned in Aluminum production.
- Wear a Hazmat Suit and bring along Iodine Infused Filters when handling radioactive products. However, when wearing it, you cannot run or fly, so it is advised to only connect the Uranium belt during the final steps.
- When everything is built and Powered, let the factory run first without the Uranium input. Check if all buildings are working.
- By uploading the save file to an Online Map, we can check the Power, Belt, and Pipe connections easily and verify which building(s) is not properly connected.
- As the production scale is large, allow plenty of time for the resources to be delivered to all buildings. Buildings at the end of a Manifold have to wait for all the preceding buildings to be filled up first before receiving their ingredients.
- Quiz: In the plan below (the last image in this section), there is one building not connected to Power. Try to spot it.
- All Uranium-related buildings will show fault indicators, which is the Yellow Indicator Light due to lack of ingredient(s).
- These buildings will be radioactive once they start running.
- Build Walkways nearby these buildings. The Walkways should be positioned above the Belts / Pipes / Splitters, and when you stand on them, you should be able to interact with the aforementioned buildings.
- Elevated Walkways should start and end with Walkway Ramps.
- This allows us to wear a Hazmat Suit, stand on the walkway, and interact with these buildings easily, without the need to jump.
- Build Walkway bridges for crossing parallel belts or buses.
- Do not build any Storage Containers for storing the Nuclear Fuel Rods.
- If you fall into the water while wearing a Hazmat Suit, switch to the Jetpack or Blade Runners to jump out of the water and onto a Foundation.
- Connect the Uranium belt and unpause the Uranium Train. Let the factory run.
A good spot to build Nuclear Power: its raw resources are packed closely together, and Water is readily available.
The schematic of 10 Nuclear Fuel Rods/min.
Preparing a belt of each resource for the Nuclear setup. Either normal node or pure node is fine, as none of the ore consumption exceeds 600/min.
Handling of the recycled Sulfuric Acid in Uranium Pellet production. The Uranium Train is paused to avoid contaminating the area with radiation.
Using Walkways to cross multiple belts and over other infrastructure. Interactions with buildings will be easier even when wearing a Hazmat Suit.
The in-game view of the Nuclear Fuel Rod production at 10/min.
The plan view of the Nuclear Fuel Rod production on the river delta.
Nuclear Power
- Add 50 Nuclear Power Plants and 125 Water Extractors to the To Do List.
- Extend the platform into the open sea. For each pair of Nuclear Power Plant, use the modular layout as shown below.
- Build five Water Extractors in a 'W' arrangement; allocate enough space for two additional Pipes to connect the outer Extractors.
- The feed Pipe should be built from the Nuclear Power Plant to the Junction, not the other way round. Switch the build mode R to 'Vertical' mode and build the Pipe as shown.
- Connect the Water Extractors and the Junctions with '2D Conveyor' mode.
- Repeat building the modules until 50 Nuclear Power Plants are built.
- A Nuclear Power Plant produces five Nuclear Waste/min when running at 100 %.
- The Nuclear Waste needs to be belted away from Power Plants to prevent them from jamming. Since the Waste cannot be deleted in any way and they are radioactive, it is advised to store it at the edge of the world.
- Construct a long belt on a Foundation bridge and bring it to the North edge of the Map.
- At the edge of the Map just before you start taking the "out of bound" damage, build Industrial Storage Containers and chain them together with belts and Conveyor Lifts.
- When the storage of the last Container is full, the items will start filling up the second last Container, and so on.
- Stack the Containers by building them on top of each other. The direction of the Container should be alternated for each layer.
- Test the storage by inserting an item into the first Container and make sure it can flow to the last Container.
- The maximum Nuclear Waste production rate is
50 × 5 = 250 / min, and an Industrial Storage Container can store48 × 500 = 24000. Each container adds 1.6 hours to the storage capacity. Build about 100 Containers.
- There are myths about storing waste in vehicles, then dumping the vehicles into the void will remove the items. That method will not work.
- Briefly connect the Nuclear Power to the main power grid to start the Water Extractors, then disconnect it again. This is to prime the Nuclear Power Plants.
- Check if the Nuclear Power generates 125 GW. Allow plenty of time to let the Nuclear Fuel Rods fill up the buffers in each Nuclear Power Plant to reach the maximum capacity.
- Alternatively, you may manually split the stacks and distribute the NFRs to each Power Plant.
- Once it reaches 125 GW, you can reconnect the Nuclear Power to the main power grid. This is to ensure that there is no fault in the system. (check the setup if it never reaches 125 GW)
- Congratulations! This 125 GW Nuclear Power should last for hundreds of hours before we have to revisit this area to expand it.
- Optional: De-commission the Turbofuel Power. However, since we have no Oil shortage at the moment, we can leave it to operate for a long time.
2 Nuclear Power Plants :5 Water Extractors modular setup. Switch the Pipe's build mode R and connect the Pipe from the Reactor to the Junction.
The plan of the module contained in 12 x 9.5 Foundations. Observe the placement of Water Extractors. The colored contour represents the radiation.
Build the storage of Nuclear Waste near the northern edge of the Map. Do not go too far until the pioneer starts taking damage.
Chaining Industrial Storage Containers with Conveyor Belts and Conveyor Lifts.
Interacting with a Power Pole to verify if the total Power capacity produced by 50 Nuclear Power Plants is 125 GW.
Oil Processing 2
- We have been using a simple but inefficient method to produce Plastic and Rubber. The existing production rates are 220 Plastic/min and 140 Rubber/min.
- To prepare for scaling up the production of Computers and Supercomputers, we will need to bump up the production of Plastic and Rubber to at least 900/min each.
- We will use a similar strategy as the Turbofuel Power, where Empty Canisters get recycled as part of the Diluted Packaged Fuel chain.
- As the Empty Canister item rate is 800/min, which is more than 780/min, divide the loop into 2.
- Prime each Empty Canister loop by inserting a sufficient amount of Empty Canisters into a Storage Container, built in-line with the loop. Ensure every Packaged Water Refinery is receiving Empty Canisters at all times.
- In this example, 25 stacks of Empty Canister are provided to each loop.
- We will also use the Recycled Plastic and Recycled Rubber recipes; they essentially produce one Plastic or one Rubber from 1 m³ of Fuel input.
- All Polymer Resin will be converted to Rubber instead of Plastic for maximum efficiency.
- We will build according to the schematic as shown below.
- For Plastic production, route half of the Plastic output back to Recycled Rubber Refineries and send the overflowing Plastic to the output belt. A similar approach applies to Rubber production.
- As the net output is 900 Plastic (or Rubber) / min, two belts are needed for each final product.
- One belt will be carrying 780 / min, the other carrying 120 / min. We have to label each belt as to distinguish them, or,
- To make parallel belts easier to manage, build a 2:2 belt balancer at the end of the production line, as shown below.
The plan of the Plastic production at 900/min.
- Test the factory in two-steps:
- First is the running test. Sink all the products and check all buildings are running at 100%.
- Second step is the ability to clear the backlogged items when unpaused: this is only needed for factories involving byproducts. Remove the Sinks and let the entire production fully back up, then sink the output again. If the factory can resume the operation by itself without getting deadlocked, that means the design is successful.
- If you have tested the Plastic setup, observe that the whole system goes into a deadlock state after some time: the Polymer Resin backs up, stopping the HOR production and thus shutting down the whole line.
- As a safety precaution, set up an overflow system for the Polymer Resin using Smart Splitter and AWESOME Sink.
- For Rubber production, overflow all the residual Rubber to the output belt to prevent clogging.
- Once the Plastic production is up and running, proceed to build the Rubber production.
- We will re-use the Railway connecting the Aluminum outpost and the base.
- Build a 4-wagon Train Station at the Oil outpost and merge the Railway to the Alclad Aluminum station from its free end.
- Alternatively, you may build a dedicated Railway between the Oil outpost and the base.
- Near the base, split the Railway and build another station for unloading of Plastic and Rubber.
- A Railway split can be created by connecting another Railway to an existing joint of two Railways. You cannot create a split in the middle of a section of a Railway.
- A Railroad Switch Control is automatically created at the split way. You can leave it untouched as Trains in automatic mode ignore the switches.
- When merging Train networks, do not mix 1-way Trains and 2-way Trains, as this will mess up the entire setup. Trains may turn around unexpectedly, potentially causing item mixing on belts.
- Trains can clip through with each other without issue, meaning there will be no collision between a Train and anything else.
- The round trip time of this train will be more than 4min 06sec. However, this is not an issue as we only need each wagon to transport 450 items/min; hence the max allowed round-trip time is
T = 32 Stack * (100 items/stack) / (450 items/min) = 7.1 minutes or 7m 6s - Connect the Train unloading Station to an ISC then belt it to the Computer and Supercomputer productions.
- De-commission the old Oil production by removing the input Oil Pipe and the Power Line. You may dismantle the old buildings or just leave it there.
- Dismantle the two belts connecting the Oil Islands and the base.
- Dismantling the unused buildings generally improves the game's performance.
The plan of the Rubber production at 900/min.
Extending a Train line by connecting a Railway to the free end of a Train Station.
Create a Railway split by building another Railway to an existing joint between two Railway segments.
Schematic of merging of Train lines via splitting and extension.
Trains and Ingot Refineries
- This section introduces the idea of transitioning from a standard-scale base to a megabase.
- Instead of simply following each step below, pause a moment after reading and comprehend each part, trying to figure out the meaning of performing each step.
- As always, be creative. If you have different ideas, go ahead and try them out! There are infinite ways to play the game.
- Use the Online Map to search for Pure and Normal nodes of Iron Ore, Copper Ore, Caterium Ore and Raw Quartz.
- Impure nodes are fine too–simply combine two of them into one belt and treat them as a belt of 600/min.
- We will build several mining outposts mainly in the northern part of the World such as at the Northern Forest, Desert Canyons, Titan Forest, and Swamp.
- The locations of the selected Resource Nodes are just an example. You may pick any other locations according to your preference.
- Transport the ore to the North Sea and process them into their respective ingots, using Alternate: Pure ingot recipe.
- We will build a Train network consisting of several Trains moving between the mining outposts and the main Refinery area.
- There is a large Oil patch at the North. Reserve some space for future Plastic and Rubber production.
- For each type of resource, build arrays of Refineries and Water Extractors with the correct ratio. The refined ingots are to be transported away via Trains, which we will build later.
- Use an Online Calculator to find out the ratio of Refineries to Water Extractors for each belt.
- Build three platforms at different heights: The Refineries and Water Extractors on the sea level, the belt transfer platform above it, and the Train platform above the belt platform.
- You can adjust the height of each platform to your preference, as long as they do not encroach each other.
- The belt platform and Train platform need not be constructed at full size. Only build the necessary Foundations to provide support for the buildings.
- For the Train setup, assign clusters of Resource Nodes to be grouped as a mining outpost. For each mining outpost, build a Train station with two Freight Platforms assigned for each resource belt.
- This is because the Train's round-trip time is likely to fall between 4m 06s and 8m 12s. If the round trip time is beyond 8m 12s, you need three Freight Platforms for each resource belt.
- Size the Train to match the Train Station. Add additional Locomotives at the end of the Train to increase the Train's traction if necessary.
- An alternative approach is to increase the number of Trains instead of its length; in that way, each Train and Train Station will be shorter, but with more Trains running on each route.
- Build a matching unloading Station at the Refinery area for each mining outpost. To simplify the setup, only use 1-way Trains. End-of-line loops are required for every train station. You can also combine all the loops and only construct a single, common Railway, as shown below.
- For the Ingots produced from Refinery blocks, use Belt compressors shown below to manage belt overflows.
- You may need to create an Excel calculation for this part.
- Read Balancer#Belt compressor for more details.
Build blocks of Refineries, starting from a corner of the sea.
The schematic of the Train schedules for this setup.
- Prior to the construction of the Refinery layout, have an overview of the resources below:
| Ore Belt | Iron Ore | Copper Ore | Caterium Ore | Raw Quartz |
|---|---|---|---|---|
| Pure (780) | 11 | 4 | 1 | 0 |
| Normal (600) | 3 | 1 | 3 | 6 |
| No. of Refinery blocks | 14 | 10* | 8* | 6 |
- We can then base on this to tile the layout of Refinery blocks for each type of resource.
- The Copper and Caterium Ingots will require lots of Refineries for each belt of ore; split each refinery block into two for easier construction.
- Based on their ore to pure ingot conversion ratios, we can expect the following output:
- To find out their ore to ingot conversion ratios, go to the wiki page of individual ingots and study the alternate recipes.
| Item | Iron Ingot | Copper Ingot | Copper Sheet | Caterium Ingot | Quartz Crystal |
|---|---|---|---|---|---|
| No. of belts | 24.7 | 8 | 3.9 | 1.7 | 3.6 |
| Freight platform per belt | 1 | 1 | 1 | 1 | 1 |
| Train configuration | 2-25 | 2-8 | 1-4 | 2-6 | |
| No. of trains | 2 | 2 | 2 | 2 | |
- A train configuration of 2-25 means two forward Electric Locomotives + 25 Freight Cars. Another example: 1-4-1 means one forward Locomotive + 4 Freight Cars + one backward Locomotive.
- As all the Trains will be of a 1-way type, only build one leading Locomotive at the front and build the remaining Locomotives at the back, all facing the forward direction. This can minimize the footprint of the Train Stations.
- We can then size the output Train according to the number of belts, with two Freight Cars for each belt of ingots. We can either build a single, long Train or multiple shorter Trains.
- Each Freight Car must only contain one type of resource.
- A Train can have multiple Freight Cars of mixed resources.
- If there are multiple Trains on the same route, space them out based on 'equal temporal' to achieve the maximum throughput.
- If there are two Trains on the same route, each Train should arrive at different Stations at the same time. When they move, they should meet at the midpoint of their schedule.
- Observe the Map and the Locomotive icons. To time the trains, activate the 'Auto-pilot' of the 2nd Train when the first has reached the opposite Station.
- Using a longer Train instead of multiple shorter Trains per route is more reliable. The timing of the trains can deviate when there is nothing to load/unload at one of the Freight Platforms.
- When constructing parallel Train Stations, their end-of-line loops can be combined into a single return Railway as shown below.
- For the construction of the Railway curves, see Railway#Building of curved section.
- After completing the Refinery and the Train Station layouts, the last step is to connect them with Conveyor Lifts and belts, and make sure each of the Freight Platforms is filled with the correct item type.
- By uploading the save files to the Online Map, check if all the buildings are working properly. Mouse hover each building to check their status.
- Check if buildings are properly connected with Power Lines, Conveyor Belts, and Pipelines.
Building Train Stations with Freight Platforms in groups to form a centralized area for transferring items between Railways and belts.
The plan for the freight depot. Buildings are color-coded to distinguish between 780 (default color) and 600 (cyan) items per minute. Railway curves are rendered as straight lines.
Use the Online Map for factory troubleshooting. This Refinery, when hovered over, indicates nothing as the recipe is not yet selected. Another Refinery at the lower left is lacking a Pipeline connection.
The overview of the completed Ingot Refinery area. Each 'block' produces a single type of Ingot. As the blocks are tile-able, this setup is expandable in the future.
- Allocate the usage of Copper Ingots according to the following ratios:
- 1 / 3 for Steamed Copper Sheets: They require Water to be produced, and hence we will build the Copper Sheet production area nearby, on the sea level.
- 2 / 3 for Wire and Fused Quickwires.
- Trains will be used to transport out the Copper Ingots and Copper Sheets away from the Refinery area.
Steel Production 3
- Revisit the Steel outpost and create a Pure Iron Ingot Refinery area over the small lake near the three Iron nodes.
- 4.5 belts of Solid Steel Ingots can be produced from three belts of Iron Ores.
- Export the following Steel products via Trains:
- 20 Steel Beam / min and 2286 Steel Pipe / min.
- Exporting Steel products instead of Steel Ingots can save the Train's bandwidth, because both Steel Pipes and Steel Beams have higher compression compared to Steel Ingot.
- The intermediate steps will not be shown here as an exercise for the reader.
Silica
- The last remaining ingredient for producing Turbo Motors is the Silica.
- Use the online map to find a suitable location to set up the Silica outpost:
- It turns out the void near the Grass Fields is a good candidate, as it has both Quartz and Limestone nodes nearby.
- Construct a floating platform there, about the same height as the two Quartz nodes. The Limestone nodes are positioned on lower ground, but we can bring them up with Conveyor Lifts.
- Extend the Railway from the Uranium mining outpost to the Silica outpost to reuse the existing Railway.
- At the other end, connect the Uranium, Steel, and Refinery Railway to form a unified Train network.
Using the Quartz and Limestone nodes near the Grass Fields to produce 3.6 belts of Silica. Sinks are used to test the setup before connecting the belts to the Freight Platforms.
Motors 2
- In the Esc menu -> Options, increase the auto-save interval to 12 minutes to reduce waiting time (auto-save induces lag). You may need to turn down the graphic quality as the factory grows.
- Minimize the use of Glass Foundations and Windows to reduce lag.
- Our next goal is to mass-produce Turbo Motors, then construct a mall.
- By looking at the Map, observe that the Lake Forest is positioned just about at the center of the map, which is a good location for our late-game production hub.
- We will also build a Train hub here to receive all the refined materials at various outposts.
- Build production floors before constructing the unloading Train Stations. We need the Train Stations to unload the right material next to the factories that require them.
- This will greatly reduce the belt spaghetti connecting the Train Stations and the factories.
- There are many steps involved in producing the Turbo Motors entirely with alternate recipes, but let's start with the Stators and Motors.
- Split the production of Stators into two groups: one for feeding Motors and the remaining feeding the Turbo Motors.
- Build a 5-floor factory based on the schematic below. The 1st floor will be Motors, the 2nd floor will be Rotors, and the 3rd floor for Stators.
- The 4th and 6th floors will be the belt-transfer floors. The 5th floor will be the Train unloading Station.
- Separate the Motor setup into multiple smaller modules. Use trial and error to design a production module.
- After the module is constructed, test it by feeding the ingredients via temporary Containers.
- Make sure the module is working before building more copies of it.
- Production facilities for other components will be built on the 6th floor and above.
Our next goal is to produce 40 Turbo Motors / min.
An example of designing a module involving verticality. Motors require Rotors and Stators; each component has its own floor and transports its output via Conveyor Lifts.
The completed setup of 93.33 Motors/min and 93.33 Stators/min for the Turbo Motors. The incoming Train unloading facility is under construction.
- Once the Motor production is up and running, sink the produced Motors to start farming the AWESOME points.
Supercomputer 2
- In this section, aim to produce 22.22 Supercomputers/min.
- Build additional floors above the Train Station floor.
- The 6th floor is the belt transfer floor.
- Start from the 7th floor and build the following setup according to your own preferences. As most items involve multiple belts, try to build in a modular fashion to avoid the need to build parallel belts.
- In this example, the 7th floor is for High-Speed Connectors, 8th floor for Computers, and 9th floor for A.I. Limiters and Supercomputers.
- Keep the belts involving Quickwire as short as possible:
- Group seven Quickwire Assemblers and three High-Speed Connector Manufacturers. For the Computer, split the Quickwire belt in 2; each feeds into six Manufacturers.
- By building one additional Assembler crafting A.I. Limiters, we can make the Quickwire-to-A.I. Limiter building ratio 1:1, simplifying the setup.
- Use Conveyor Lifts to bring the High-Speed Connectors and Computers to the upper floor, feeding the Supercomputer production.
- Dismantle some of the Foundations where the Lifts are positioned.
- Walkway Crossings can be used to patch up the holes in the platform. Although not visually appealing, they reduce the chance of falling through the holes.
- Build Train Stations to unload Plastic, Rubber, and Alclad Aluminum Sheet. Disconnect the Railway connecting their outpost to the old base and divert both Railways to unload here instead.
Schematic of Supercomputer production at 22.22 / min.
Production plan of 66.67 High-Speed Connector / min.
Production plan of 44.44 Caterium Computers / min.
Production plan of 22.22 Supercomputers / min.
Revamping the Western Train system by converting each of them to 1-way types and merging them with the main Train network.
The completed factory with Train unloading station at the 5th floor. The lower floors produce Motors while the upper floors produce Supercomputers.
- Continue building upper floors for the final steps of automating Turbo Motors.
Turbo Motors 2
- With most of the preparation work done, the Turbo Motors are ready to be produced.
- Build another two floors above the Supercomputer production.
- The 10th floor is for A.I. Limiters and Heat Sinks.
- The 11th floor is for Radio Control Units and Turbo Motors.
- Build a Sink at the Turbo Motor output belt–do not Power the Sink yet.
- Let the entire factory run for a couple of hours to allow all ingredients to fill up the buffers of all machines, then Power the Sink. While the machines are running, search for bottlenecks or faults.
- Using the Online map is a quick way to check on all the machines' status.
- Check if all the Trains are working properly.
- Some of our Train schedules have two or more Trains running on the same route. Make sure they are spaced out equally, otherwise the throughput will be reduced.
- Refer to the previous section to recall how to time the Trains.
- If you face difficulty timing the Trains, consider adding additional Trains to the same route.
The reduced version of the Turbo Motor production schematic.
The plan showing the production of A.I. Limiters and Heat Sinks.
The plan showing the production of Radio Control Units and Turbo Motors.
The completed setup of 40 Turbo Motors / min with 11 floors. The output is connected to an AWESOME Sink to farm Coupon points.
A proper mall and warehouse
- Before abandoning the old base, prepare to shift our main operation area to the Lake Forest by constructing a mall there.
- Build the mall beside the Turbo Motor production.
- Produce the following:
 Iron Rod: 20 / min
 Iron Plate: 20 / min
 Concrete: 100 / min
 Screw: 100 / min
 Wire: 100 / min
 Cable: 100 / min
 Quickwire: 100 / min
 Copper Sheet: 20 / min
 Reinforced Iron Plate: 20 / min
 Rotor: 20 / min
 Modular Frame: 20 / min
 Heavy Modular Frame: 20 / min
 Steel Pipe: 20 / min
 Steel Beam: 20 / min
 Encased Industrial Beam: 20 / min
 Motor: 20 / min
 Plastic: 20 / min
 Rubber: 20 / min
 Packaged Fuel: 20 / min
 A.I. Limiter: 20 / min
 Circuit Board: 20 / min
 High-Speed Connector: 20 / min
 Crystal Oscillator: 10 / min
 Computer: 10 / min
 Supercomputer: 10 / min
 Filter: 10 / min
 Iodine Infused Filter: 10 / min
 Nobelisk: 10 / min
 Rifle Cartridge: 10 / min
 Alclad Aluminum Sheet: 19 / min
 Turbo Motor: 10 / min
- Another material is optional, as we only include material involved in construction or equipment crafting.
- Expand the mining network to cope with the increased consumption.
- Expand the various production outposts, particularly the Oil and Aluminum outposts since we have already maximized their usage.
- When Power consumption exceeds 60% of the Power capacity, expand the Nuclear Power setup.
- Re-visit the Nuclear Waste Storage area and increase the buffer size where required. Consider relocating the Storage to the North-East corner of the Map at 1.5km above sea level.
- Build at least 1000 Industrial Storage Containers for that.
- Build the mall storage at the topmost floor, with all the production factories on the lower floors.
- Build at least two Industrial Storage Containers for storing each item. Building too much storage is not advised as it may create difficulties when future alterations are required.
- Label each Container by building a 1-meter short belt out from its output.
- Build a Hyper Tube Cannon Hub at the top floor as well, with eight cannons facing eight directions of the Map.
- Re-align the Hyper Tube Cannon at each outpost to the new base.
- Once the mall is up and running, de-commission the old base. Recycle or Sink the excess materials.
- Add the Resource Nodes near the old base to the Train network as well.
Turbo Motors 3
- Turbo Motor is the most efficient item for farming AWESOME Points.
- The theoretical maximum production rate of Turbo Motor is 156 / min, which is bottle-necked by the number of Bauxite nodes on the Map.
- As we have to keep a reserve of Alclad Aluminum Sheets for building Conveyor Belt Mk.5, aim for 153 Turbo Motors/min instead.
Golden Nut
- Once a sufficient number of Coupons is obtained, buy all the Statues you can afford, including the
 Golden Nut.
 - Statues can be bought multiple times as long as you can afford them.
- Other than building the factory, set your own custom objectives: Taming all the Lizard Doggos in the World, collecting 100% of the Power Slugs, Somersloops, and Mercer Spheres, etc.
- There are currently some issues that disallow the collection of some items due to encroachment issues. Consider using the clipping trick that we have learned earlier.
- There are many caves that we have yet to explore–each contains its own reward.
- You may also start to consider building aesthetically, using various types of Foundations/Walls and touching up with the Color Gun.
- Use the online map to create fancy Foundation shapes such as circular Foundations, etc.
- There are also unofficial Mods that add fan-made content into the game. Try them out!
Tips and Tricks
- In the early game, pick up leaves as you walk. They are essential biomass as an early-game power source.
- Almost every resource patch is guarded by creatures such as Fluffy-tailed Hogs. Approach with caution and kill them. Pay attention to the sound they make.
- Remove the deposits that rest on the Resource Node so that you can place a Miner on it. You need to hand-mine it. The deposit gives you 50-100+ ores.
- Leave sufficient space between buildings so that you can connect them with belts later.
- After placing a Constructor, buffer it with a Storage Container by placing one after it to have a consistent supply of components ready to go.
- Watch out for power demand. Make sure the power capacity is always higher than the peak power demand.
- A Power Pole has four connections: two for buildings and two for chaining to other poles. Later in the game, you will have better Power Poles.
- You can align your buildings by looking for the thick green lines. Build Foundations for easier snapping.
- Be creative. Use belts, ladders, or foundations to reach hard-to-access areas.
- The quickest route to coal power is Hub Upgrade 6 -> Part Assembly (Tier 2) -> Space Elevator first delivery -> Coal Power. After getting the coal power set up, come back and complete the Tier 1 Milestones.
- Use the Conveyor Pole Stackable & Conveyor Lifts for elevated conveyors combined with Splitter for the most efficient use of ground space.
- While your factory is slowly crafting the parts, you could bring your weapon and explore the World.
- Some collectibles are located on high ground. Others are hidden inside caves.
- When taking a screenshot in the photo mode (default P), the screenshot will be saved at
Documents\My Games\FactoryGame\Screenshot. Un-equipping the handheld item before entering photo mode allows for an unobstructed screenshot. - You can use photo mode as binoculars by zooming in (use the Mouse wheel to change the FOV).
- Do not panic if you get yourself killed; you can always make your way back to the location of the death to get back your items. They are stored in the crate.
- Swimming is considerably slower than repeatedly jumping out of the water. Without Blade Runners, this method is approx. 1.5 - two times faster. With Blade Runners, this method is 2.5 - three times faster than regular swimming.[6]
- Search for waterfalls. Who knows what might be behind them.
See also
References
- ↑ https://www.youtube.com/watch?v=a4L0IdcUS9Q
- ↑ https://www.youtube.com/watch?v=qBmVdPaapN8
- ↑ https://daniel2013.github.io/satisfactory/calculator
- ↑ https://daniel2013.github.io/satisfactory/calculator
- ↑ https://satisfactory-calculator.com/en/interactive-map
- ↑ https://www.youtube.com/watch?v=w-dYjV4l_Yc&feature=youtu.be
Production Flow Chart https://imgur.com/gallery/YkOdt58 (dated March 23, 2019, old version)
| ||||||||||||||||||||||||||||||||


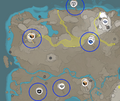
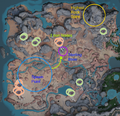


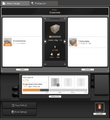


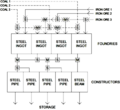


![Using Daniel's Calculator to plan the factory production.[3]](/images/thumb/7/73/Daniel_calculator_Steel_production.png/120px-Daniel_calculator_Steel_production.png)


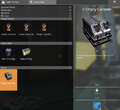


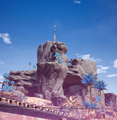


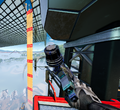

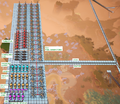

![The completed Turbofuel Power outpost, generating 25 GW. This Map is generated by uploading the save files to Satisfactory Interactive Map[5].](/images/thumb/f/fd/Interactive_map_Turbofuel_Power.png/120px-Interactive_map_Turbofuel_Power.png)
